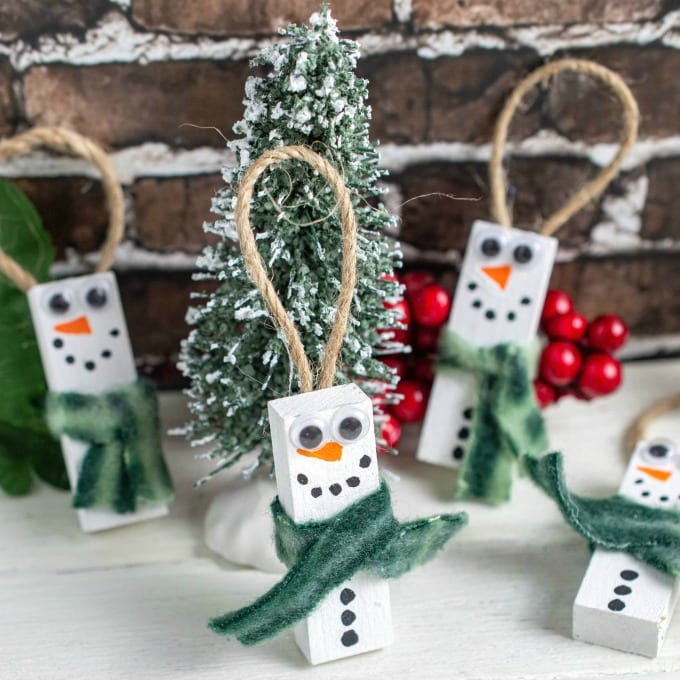
Wooden Snowman Ornaments

Wood Snowman Decorations- this quick inexpensive craft makes adorable decorations for your Christmas tree or holiday packages. In just a few minutes, you can create your own Wooden Snowman Ornaments with blocks, a little fabric, and a few other craft supplies.

For more, check out these Painted Wood Ornaments made with the same basic supplies.
FYI, this contains affiliate links. We may earn a small commission when you buy through links on our site, which help support the free content you love here at Juggling Act Mama. Learn more.
If you saw, and I hope loved my Painted Wood Ornaments Craft, then this post is for you. Once again, I’ve used a Dollar Tree Tumbling Tower Game to create these adorable snowman ornaments. The options really are endless with this combination of supplies.
These wooden snowman ornaments would be a cute addition to the decoration for DIY gifts like a plate of Homemade Fudge or a jar of Peppermint Scrub, too. You can also tie them onto presents for under the tree by looping your gift ribbon through the twine and tying a bow with the ribbon.
They are so easy to make, so let’s get started!
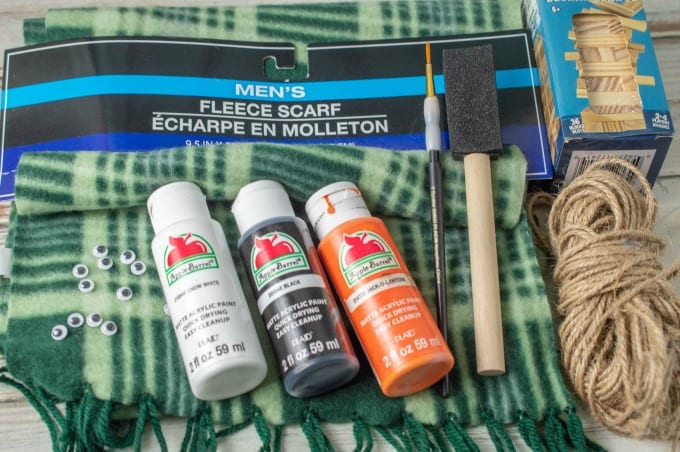
Materials
Makes 8 Wooden Snowman Ornaments
- Wooden blocks – I used the Dollar Tree Tumbling Tower Game with light and dark blocks – or scrap wood cut to approx 4.75″x1.25″
- A scarf or scrap fabric
- Twine
- Small googly eyes (16 eyes)
- White acrylic paint
- Orange acrylic paint
- Black acrylic paint
- Small foam paintbrush
- Small detail brush
- Scissors
- Hot glue gun w/ glue stick
(For my paint, I used Apple Barrel brand, which is my favorite acrylic paint for small projects like this. However, if you don’t have a steady hand for painting, thin paint markers work really well also.)
Instructions
- Using the small foam brush, paint the blocks white. Let dry. Paint two coats if needed, drying in between coats.
- While they are drying, cut 8 small pieces of the scarf to the size you would like. (About the length of 2 blocks and the width of the skinner side of a block.)
- Glue the eyes at the top of the block.
- Using the detail brush, paint a small orange triangle for the nose and small black dots for the mouth. At the bottom, paint 3 dots for the buttons. Let dry.
- After the blocks have dried, add a dot of glue to the middle of the back of the ornament and secure the scarf. Wrap around and glue in the front. Fold the scarf and secure it with glue.
- Cut 8 pieces of twine about 2 inches.
- Make a loop and glue it to the top of the back of the ornament. Alternatively, you can use an eye hook on the top as we did on the Painted Wood Ornaments here.


It’s as simple as that! Aren’t these just the cutest?!
Customize Your Ornaments
You can easily make the wooden snowman ornaments your own by using different fabrics or ribbons for the scarves. Personalize them by adding a child’s name or the year on the back using a paint marker or a permanent marker. You could even cut the blocks down and paint them black to make little top hats for your snowmen!
More Easy Ornament Ideas
If you enjoy these Wooden Snowman Ornaments, check out our other ornament tutorials:
- Dried Orange Slices for Ornaments
- Button Christmas Tree Craft for Kids from Crafting Reality with Sara
- Frozen-Inspired Popsicle Stick Ornament from Mommy’s Bundle
- Wood Photo Ornaments
- DIY Clear Christmas Ornaments
- Paper Mache Ornaments
- Popsicle Stick Sled Ornaments
- Wood Circle Ornaments Cricut Craft
You can also find more DIY ornament ideas here on my Pinterest board.