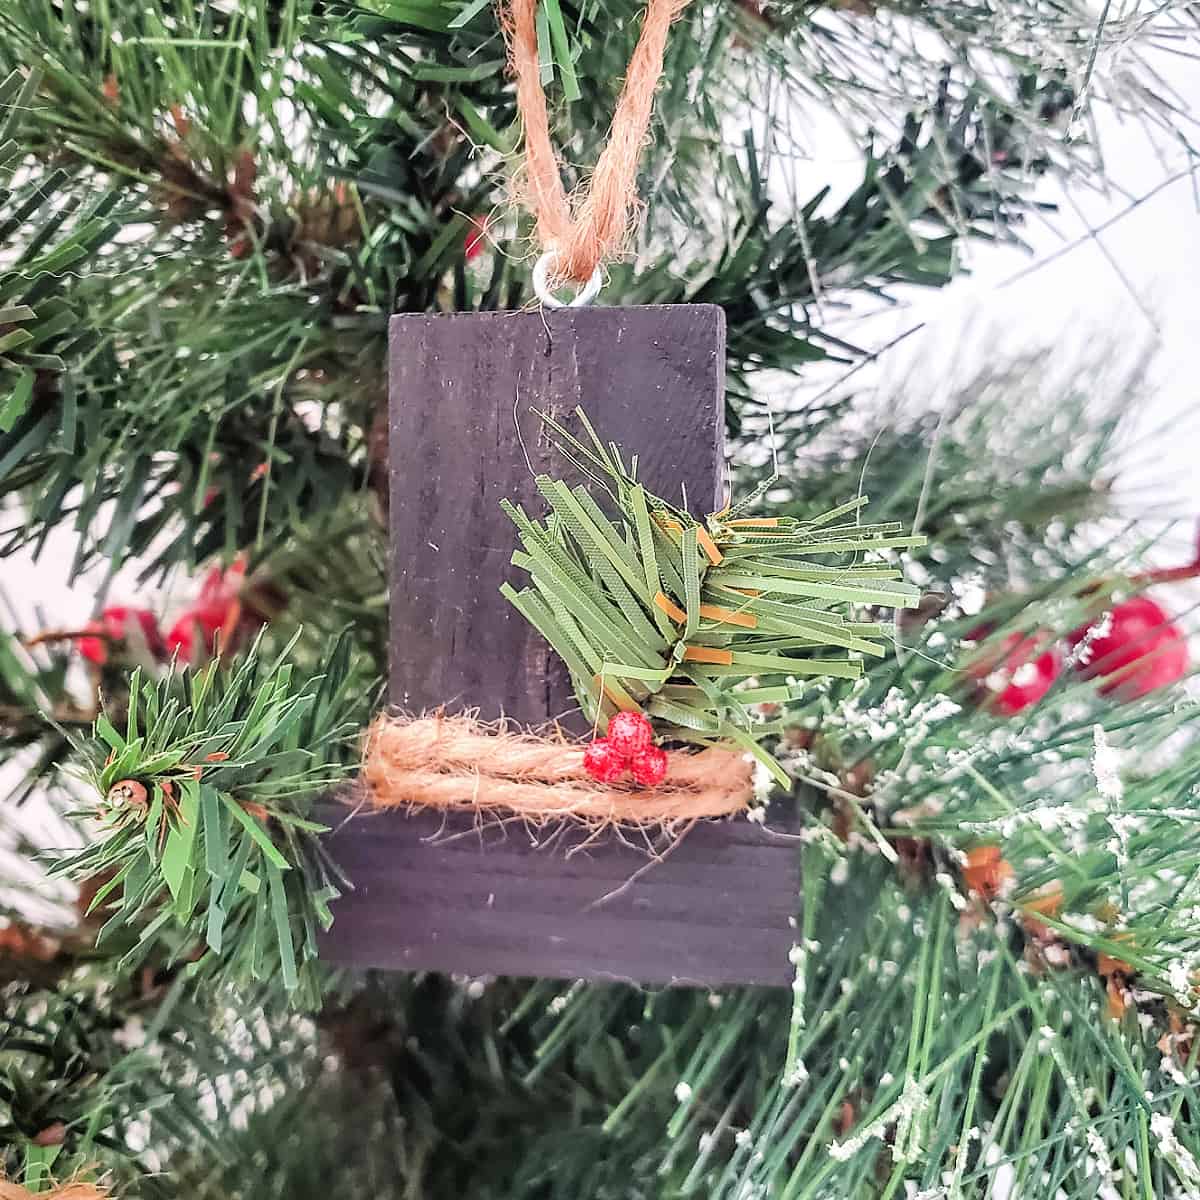
Snowman Hat Ornaments

Cute snowman hat ornaments are a cinch to make, plus they inexpensive! You can find the blocks at your local dollar store.
This is a really simple and fun ornament craft. You’ll find most of the materials you need at your local dollar store.
I love making quick and easy ornaments, especially with the kiddos. These are inexpensive so you can make a whole bunch for just a few dollars.
This holiday craft would be a great activity for a Scouting meeting or classroom project, too. School-age kids can easily make these snowman hat ornaments with just a little bit of supervision (depending on age).
FYI, this post and tutorial contain affiliate links. We may earn a small commission when you buy through links on our site, which help support the free content you love here at Juggling Act Mama. Learn more.
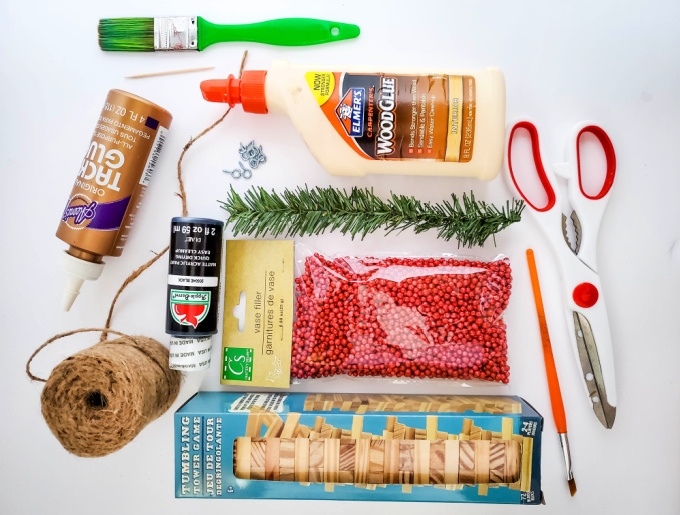
✂️Supplies Needed
The following are affiliate links. We are a participant in the Amazon Services LLC Associates Program, an affiliate advertising program designed to provide a means for us to earn fees by linking to Amazon.com and affiliated sites.
You can find many of the craft supplies you need like the craft brushes, twine, and greenery at your local dollar store.
- Blocks from Tumbling Tower Game
- Twine
- Fake pine Christmas garland
- Red vase filler
- Eye hooks
- Wood glue
- Black craft paint
- Tacky glue
- Scissors
- 1 inch paint brush
- Small paint brush
- Toothpick
Be sure to check out my Juggling Act Mama Storefront on Amazon where you’ll find all kinds of great products that will make your life easier! Thanks so much for being a part of Juggling Act Mama ❤


📝Instructions
Here’s how to make snowman hat ornaments using wood blocks and a few other dollar store items.
- Glue two blocks
Brush the wood glue onto the side of one block to adhere it to another block to make the top part of the hat. Hold for 30 seconds or so until the glue starts to set.
- Glue the third block
For the brim of the hat, brush more glue onto the side of a block adhere to the two blocks you previously glued together.
- Paint
Once the glue is set, carefully paint the blocks black. Set aside to dry.
- Cut twine
Once the paint is dry, cut two pieces of 7-inch twine lengths.
- Glue twine
Add a small amount of tacky glue to the ornament where the three blocks meet (use the toothpick). Wrap the twine around the edge where the blocks meet and hold until secure.
- Add embelishments
Cut a 1-inch piece of garland and glue it above the twine. Then use a small dab of glue to adhere the red vase filler so it looks like holly berries.
- Add hanger
Screw an eye hook to the top of the hat. Add a piece of twine so the ornament can hang.


Similar Projects
Here are some other DIY projects you might also enjoy: