DIY Herb Garden Planter
A Herb Garden Planter is a great little container garden project, and with a little help from Dollar Tree, and some a clever hacks, we’ll show you how to create an easy rustic planter!
FYI, this contains affiliate links. We may earn a small commission when you buy through links on our site, which help support the free content you love here at Juggling Act Mama. Learn more.
Gardening can feel like an expensive hobby. All the plants! All the pots! And don’t get me started on the price of premium soil. But what if you could create a beautiful and table-top-worthy herb garden planter with a little help from your favorite dollar shop? Well, I have news for you. You can!
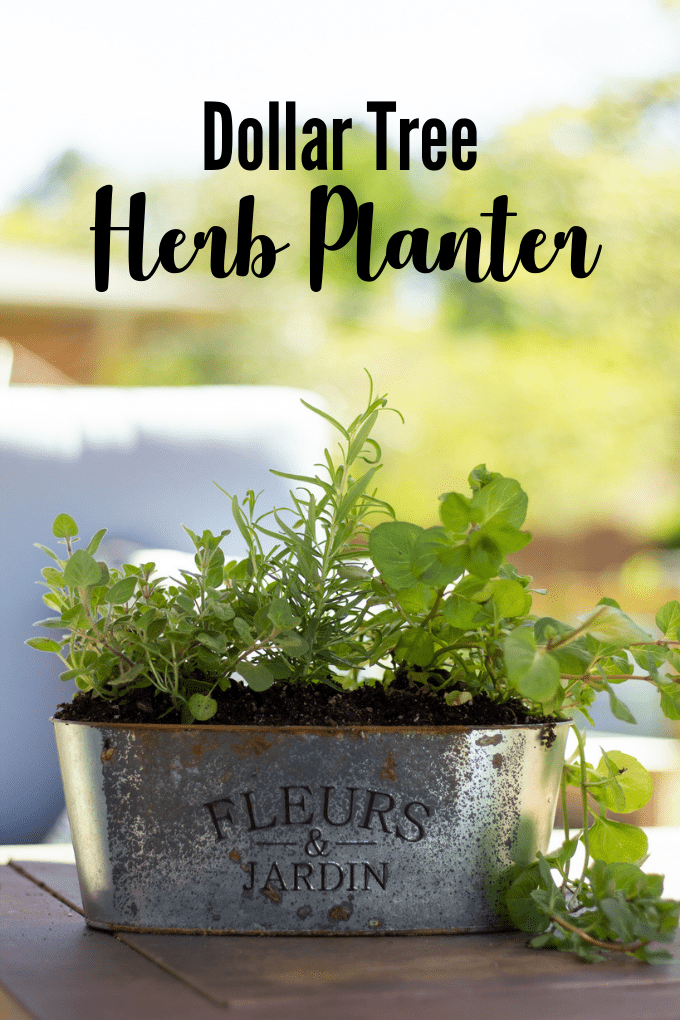
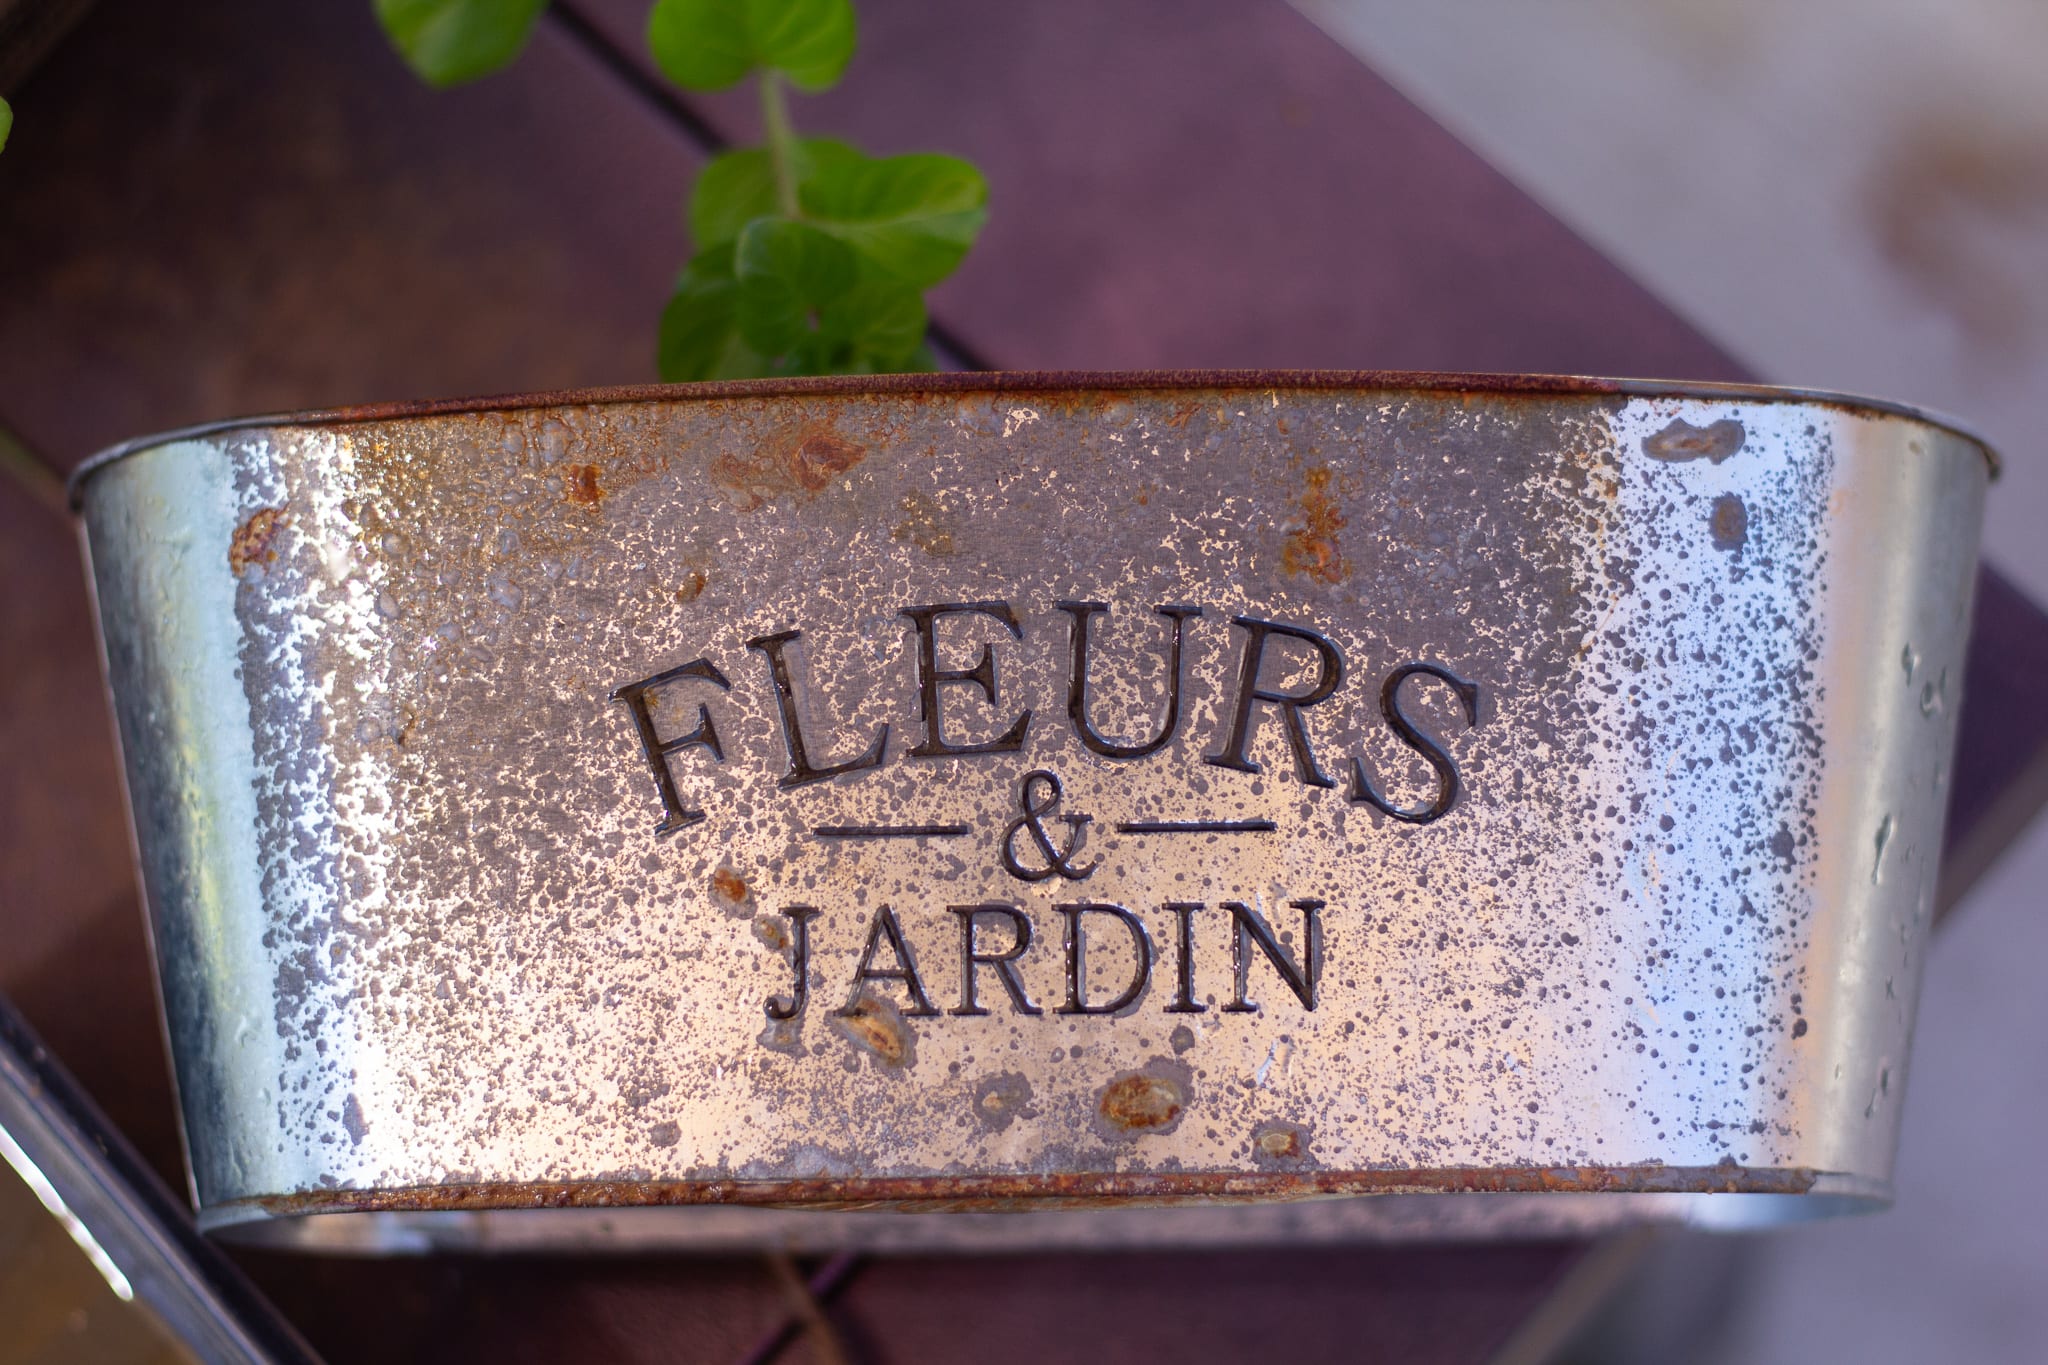
Hey all! It’s Courtney from The Kitchen Garten, and I love bargain shopping; it’s true, and I am also a big fan of putting my hands in the dirt and growing all. the .things. So, on a recent trip to the Dollar Tree, I noticed this shiny metal container, complete with French words, and I was sold. And since spring has finally arrived, I knew it would be perfect for a herb planter. Containers are the perfect place for herbs, especially those that are annual (die in the winter) or those that can go crazy in the ground (I’m looking at you, mint).
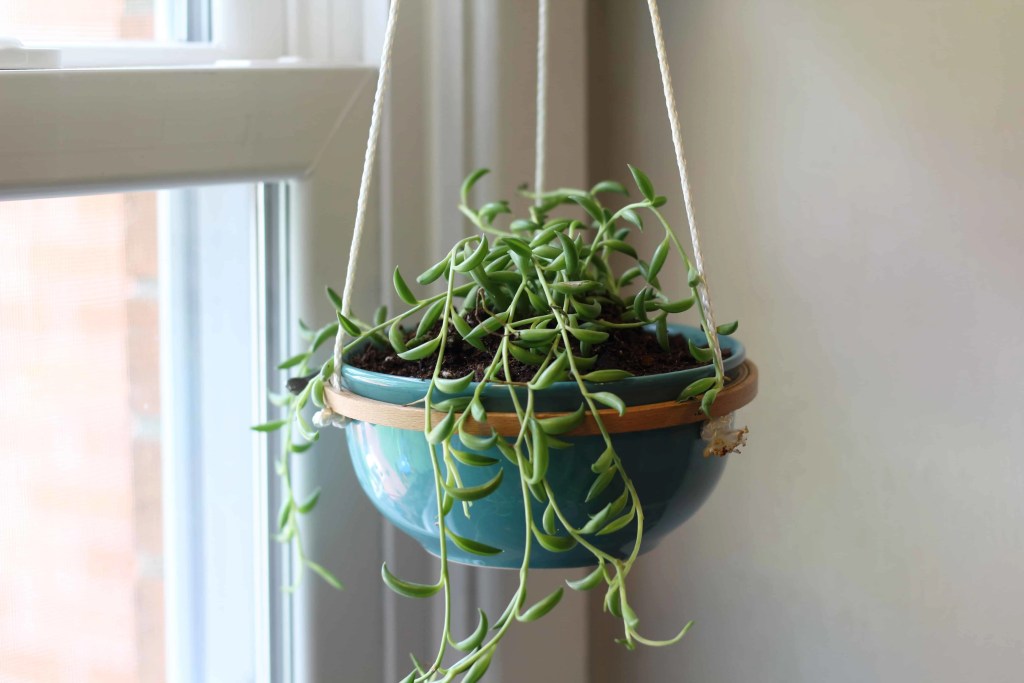
I’ve used Dollar Tree finds in my gardening adventures before with my DIY Hanging Succulent Planter.
I love paying less for project materials and making something beautiful and useful for the home. This also makes an amazing DIY gift, too! Think about making this for:
- Hostess Gift
- Mother’s Day
- Teacher Appreciation (download these free gift tags!)
- Housewarming Gift
It would also make lovely centerpieces for a garden-themed bridal or baby shower, too! You could add a pretty flowering annuals like verbena or petunias for a burst of color. Calibrachoa is also great for container gardens. That’s what Ang used in her Pallet Planter.
So what do you need to get started on this fun project?
Herb Garden Planter Materials List
- One Dollar Tree metal bucket (or any bucket you like)
- 2-3 herb plants (any will do)
- River rocks
- Vinegar
- Salt
- Hydrogen Peroxide

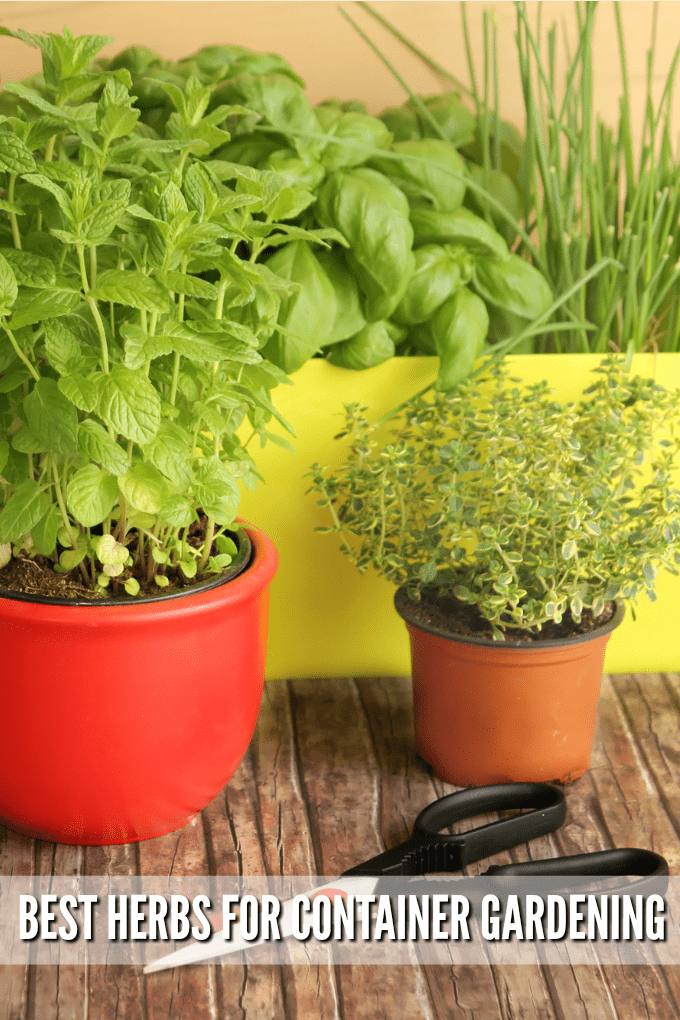
What herbs are best for container gardening?
If you just want your container to have one type of herb, you can choose whatever you like. However, if you’re looking to plant two or more, think about what type of soil conditions the plants need.
Herbs that like plenty of water:
- mint
- lavender
- chives
- coriander
- parsley
Herbs that prefer well-drained soil:
- thyme
- rosemary
- sage
- basil
- oregano

How to Make a Rustic Dollar Tree Herb Planter
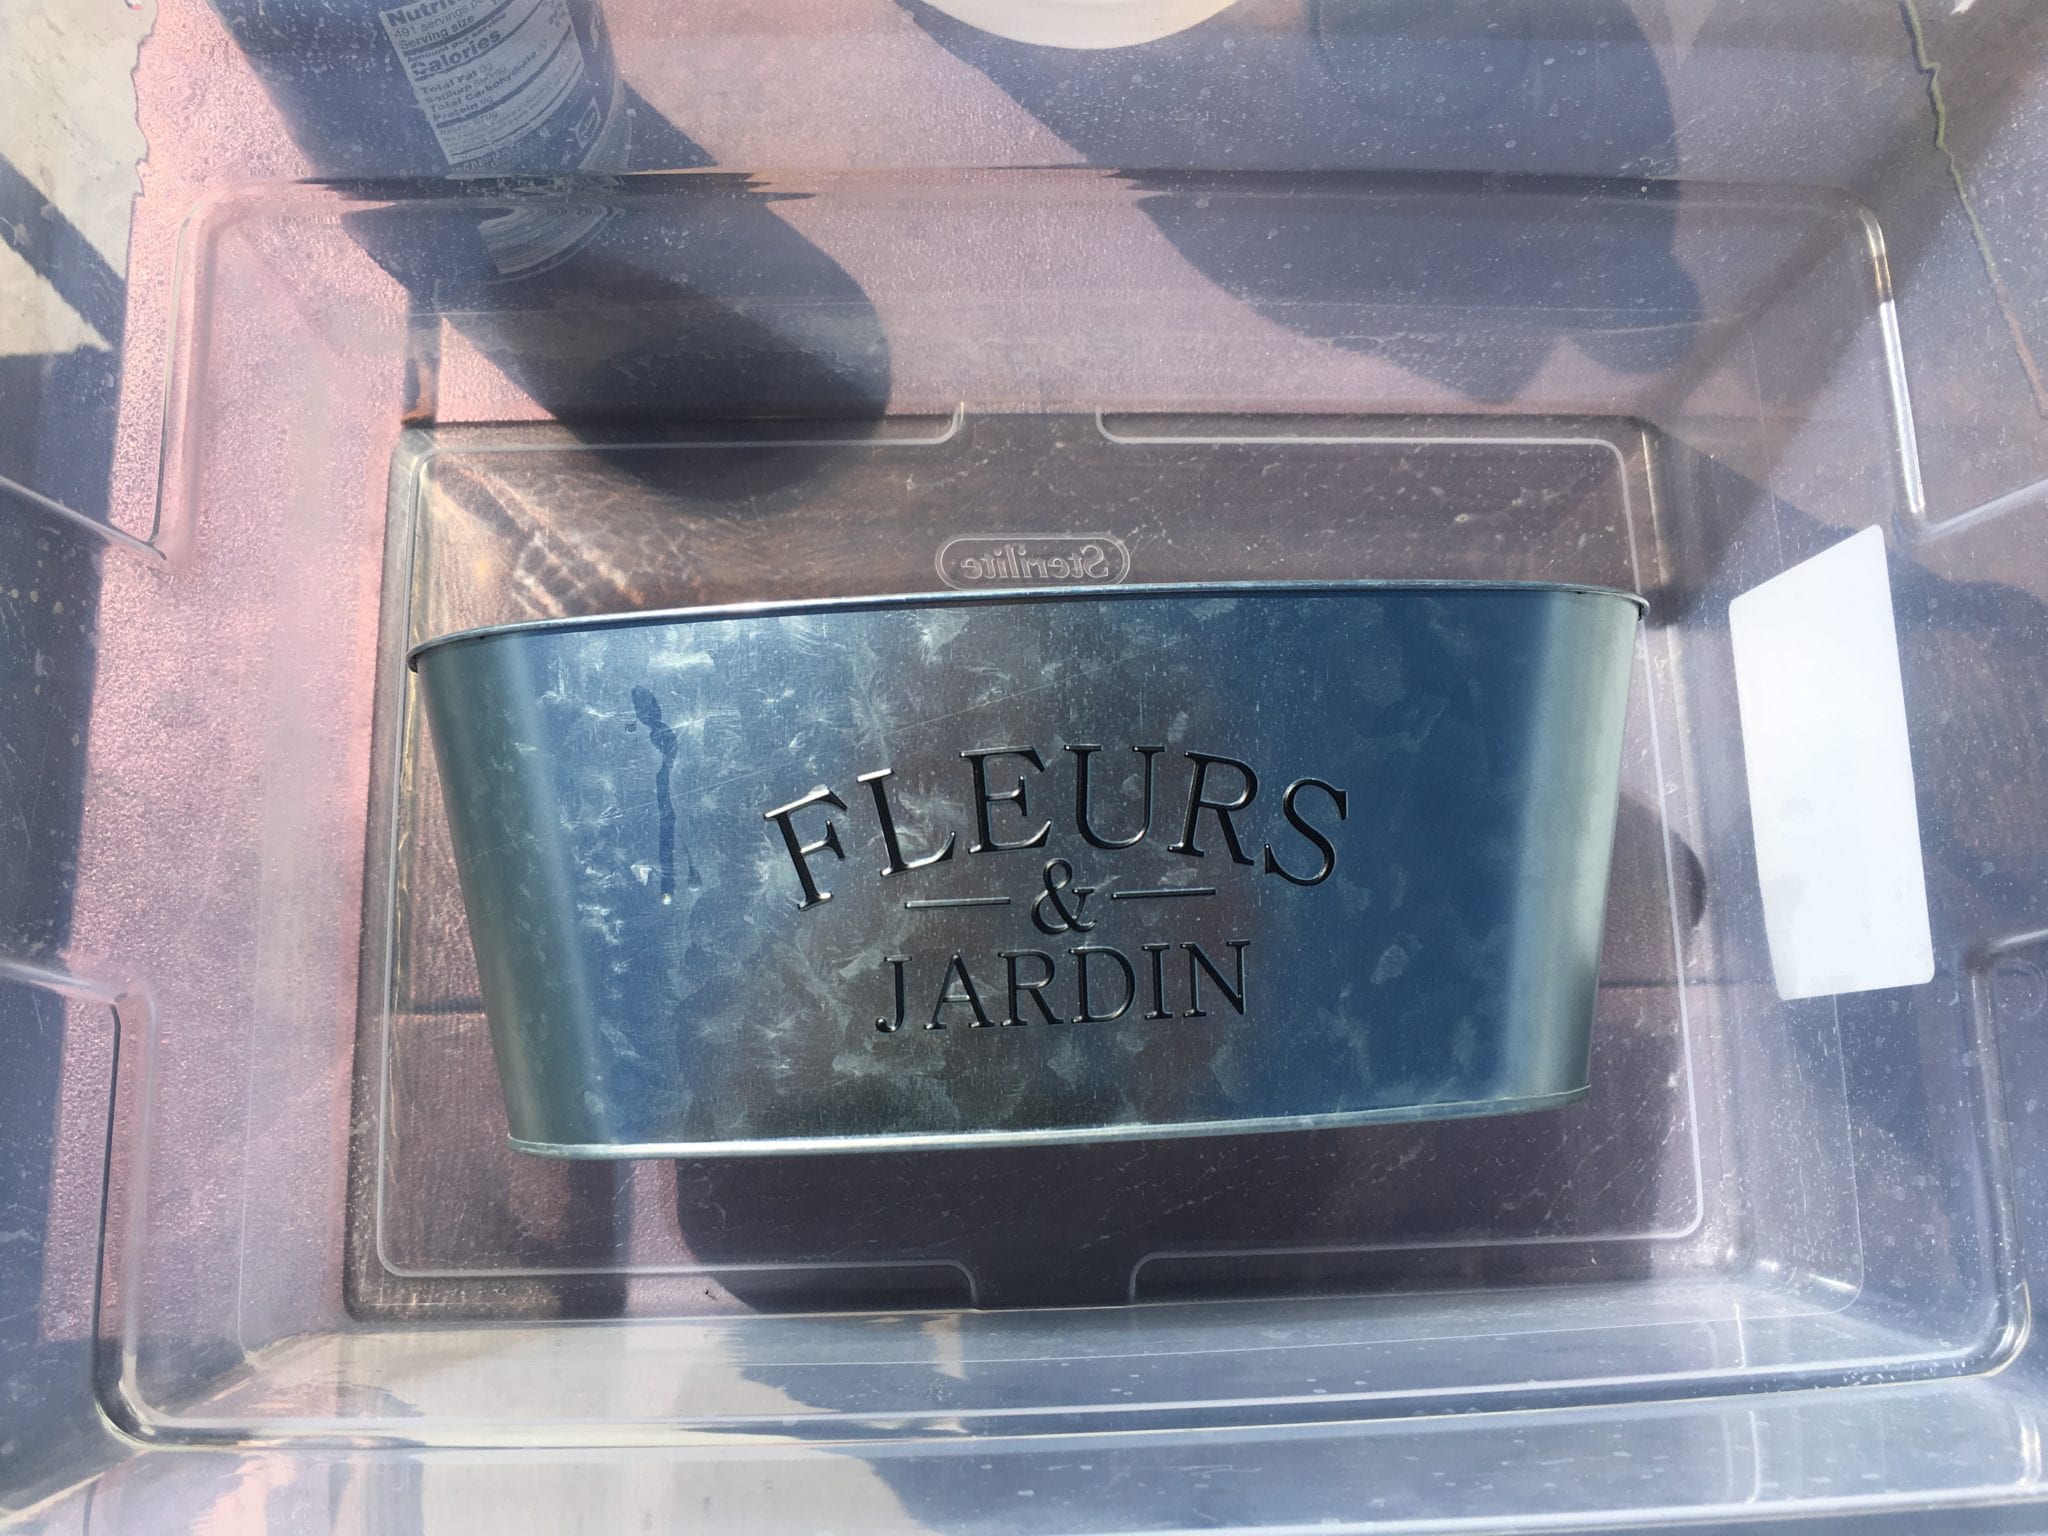
Start by aging your bucket. I love shopping at Dollar Tree for things like this! I didn’t care for the shiny metal look of the planter, so I decided to “age” it using instructions from Saws on Skates.
- Since the planter is an oval shape, this was a bit tricky, but place your bucket in a larger plastic container.
- Add 1/2 cup of salt and a gallon of white vinegar to the container. Submerge one side of your planter.
- Let it sit for an hour or so (or longer if you’re not home). After that, flip the container and submerge the other side. You should notice discoloration starting to appear on the metal.
- Once both sides have been submerged in the salt and vinegar mix, pour out the leftover liquid. (I used my leftover vinegar/salt mix in my DIY Weed Killer sprayer.)
- Now pour hydrogen peroxide on the container, submerging one side for an hour, then repeat on the opposite side.
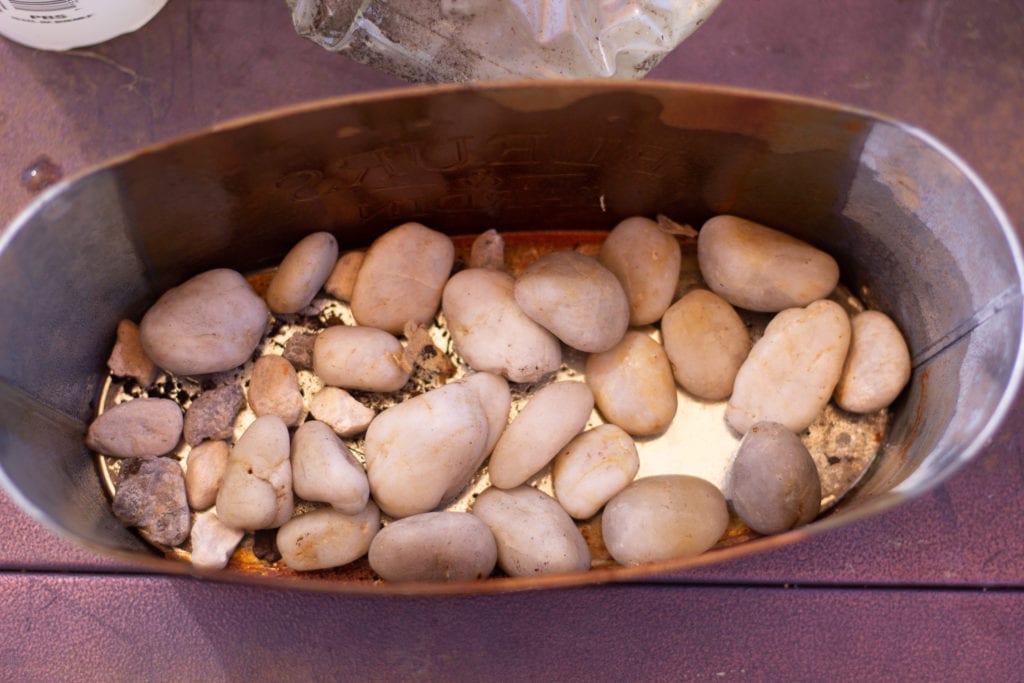
What you’ll have afterwards is a lightly rusted and weathered planter.
- Then you’ll want to create drainage for your herbs by placing river rock or any smaller stones in the bottom of the planter. This keep water from sitting at the bottom of the soil which could damage the roots of your herbs. And since this rustic planter is smaller, the rocks at the bottom will not create a heavy planter that is difficult to move or carry.

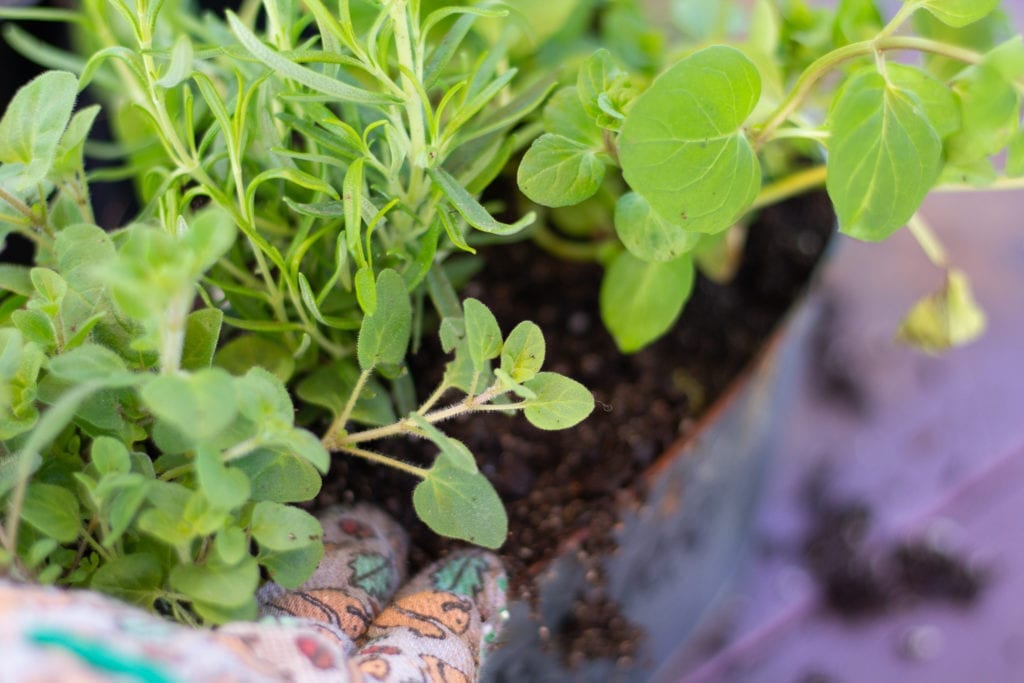
- You’re now ready to start adding your herbs. Chances are, if you purchased herbs in larger cups, you may have all the soil you need right there. So begin by deciding which order you’d like your herbs in. My taller herb, rosemary, went in the middle, while the hanging mint and low-growing oregano went on either side. Once you’re ready, squeeze the herb container and gently remove it from its cup. Once it’s free from the original container, gently loosen the soil at the bottom to break up any bound roots. This will help your roots to grow and thrive. Once the herbs are in place, use any extra soil from the cups to fill in any gaps in the planter. If needed, grab extra potting soil to do this.
- Finally, clean up any loose soil clinging to your Dollar Tree Herb Planter and lightly water your herbs. You’re ready to add your new planter to any outdoor patio space or to gift it to a lucky family member or friend. Most importantly, be sure to use the herbs that you’ve planted.
Printable Tutorial
Here’s the full tutorial that you can print out at home.

Rustic Garden Herb Planter
As an Amazon Associate, I earn from qualifying purchases.
Materials
For the Rustic Planter
- 1 Metal Planter Dollar Tree
- 1/2 Cup Salt
- 1 Gallon Vinegar
- 1 Bottle Hydrogen Peroxide
For Filling the Planter
- 1 Cup River Rocks or other stones
- Soil
- 3 Herb Plants
Instructions
How to Age the Metal Planter
- Fill a large plastic container with salt and vinegar. Place the metal planter inside, so it's submerged on one side. Let sit for at least an hour (longer is totally fine, too). Turn planter over and repeat soaking on other side.1/2 Cup Salt, 1 Gallon Vinegar, 1 Metal Planter
- Pour out vinegar/salt mix, keeping container. Place planter back in container and pour hydrogen peroxide over the planter. Allow it to soak for an hour on each side. After it’s finished soaking, remove planter and rinse out inside.1 Bottle Hydrogen Peroxide
How to Assemble the Planter
- Place rocks in the bottom of the now rustic planter.1 Cup River Rocks or other stones
- Then determine which order herbs will be arranged and begin planting them atop the rocks in the planter.3 Herb Plants
- Use any extra soil from the herbs’ original cups to fill in any gaps in the planter. (You can also use additional potting soil if needed.)Soil
- Lightly water your new herbs and put your planter on display!

If you decide to give this as a housewarming gift, include a set of these Anthro-inspired DIY Oven Mitts as well. Both with make a new kitchen feel like home in no time.
Fun DIY Projects
- DIY Succulent Wreath Tutorial
- DIY Gold and White Striped Flower Pot
- Wooden Spoon Garden Markers
- How to Hang Patio Lights
- DIY Pallet Storage
Courtney did a fabulous job on this project!
Thanks for stopping by Cindy 🙂