How to Hang Patio Lights

Outdoor lighting can seem daunting, but I promise it doesn’t have to be! Let me teach you How to Hang Patio Lights and your backyard will be Summer ready in no time! We’ll show you how to hang string lights in your backyard even if you don’t have a single tree!

I wanted elegant and whimsical string lights over our patio but I wanted it all to look simply effortless. It took us a little trial and error to figure out exactly how to hang outdoor patio lights, but I do think this is the easiest method.
What is the best way to hang outdoor string lights?
Fancy brackets, hooks, and poles can be expensive. By using EMT conduit and PVC conduit, you can hang beautiful string lights over your patio inexpensively.
All you need to do is add one-hole straps to the top of the EMT, which will hold the guidewire. Then, add a little spray paint really gives the whole thing an expensive look. Next, secure the EMT into PVC ‘holders’. After that, all that’s left to do is string up the lights! Maybe that was too quick, let me walk you through it!
For each pole you will need the following:
- (1) 3/4″ x 10′ EMT conduit
- (1) 3/4″ EMT one-hole straps – to secure the guide wire
- (1) #10 x 1/2 in. Zinc Plated Steel Self-Tapping Pan Head Phillips Drive Sheet Metal Screws
- (1) 1-1/4 in. x 10 ft. PVC Schedule 40 Conduit, cut to 36″ – to anchor the pole
- (1) 1/2″ knock-out seals – to cap the conduit pole
Materials and Equipment
The following are affiliate links. We are a participant in the Amazon Services LLC Associates Program, an affiliate advertising program designed to provide a means for us to earn fees by linking to Amazon.com and affiliated sites.
Here is a complete list of materials – please be sure to purchase the correct amount of materials for the number of poles you want to install.
- 3/4″ x 10′ EMT conduit
- 3/4″ EMT one-hole straps
- #10 x 1/2 in. Zinc Plated Steel Self-Tapping Pan Head Phillips Drive Sheet Metal Screws
- 1-1/4 in. x 10 ft. PVC Schedule 40 Conduit
- guide wire
- spray paint (I used this paint for mine).
- electric outdoor string lights or solar string lights
- extension cord
- drill
- wire cutters
- ladder
- hammer
- mallet
- nail set or nail punch
- hack saw
Be sure to check out my Juggling Act Mama Storefront on Amazon where you’ll find all kinds of great products that will make your life easier! Thanks so much for being a part of Juggling Act Mama ❤
How to Hang Patio Lights
- First, mark one side of each EMT conduit as the top of your supports.
- On each, measure the same length down from the top for the location of the one-hole EMT strap which will act as a “hook” to support your guidewire. Mark the spot with a permanent marker.
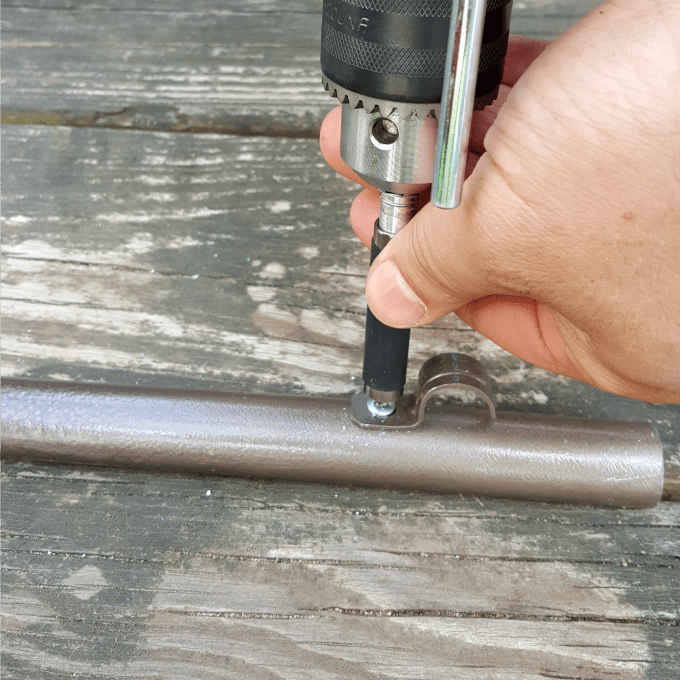
- Next, pre-drill small holes into the 3/4″ x 10′ EMT conduit at the locations you marked earlier. Use a nail punch or nail set to make a small indent to help guide your drill bit. Make sure to use a bit that is slightly smaller in diameter than the screw you will use to attach the one-hole EMT strap.
- Now, spray paint the poles and hardware the color of your choice.
- Then, cut the PVC pipe to 36″ and use a mallet to drive it at least 24″ into the ground. You can spray-paint this as well.
- Once that’s done, place your pole into the PVC pipe and push it into the ground. This will help secure the poles.
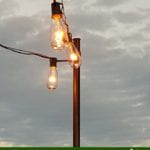
- Now, string the guidewire through the strapping in your desired pattern.
- Finally, string your lights using the guidewire.
Photographs to Guide You


Hi,
I know this post was from a while ago. I was just wondering if now that you’ve used it for over a year, is there anything you would change? I would like to do this but it seems like you would need bigger diameter conduit so it wouldn’t bow as you tightened the guide wire cable?
Thanks for your thoughts and help!
Hi Brandi! Thanks for stopping by – this is a great question.
I don’t know that I would make any major change to the setup. In fact, we moved since I wrote this post and are planning on putting up new ones with this method in the Spring. (I’ll be sure to update the post with some new photos.)
String lights like these don’t tend to be too heavy. The guidewire doesn’t need to be ridged, and you don’t need to over-tighten it to provide support for the lights.
I’d love to know how your project turns out! Share a photo when you’re done 🙂
What did you use to cap the end of the conduit pipe? I don’t see that part listed on the supplies list.
Hi Jeff, thanks so much for catching that! We used 1/2″ knock-out seals. You can get them in a 4-pack at your local hardware store.
I’ve updated the post. 🙂
This is great, thanks! Is a 1/2” knockout seal the right fit for a 3/4” EMT?
Yep, that’s what we used 🙂 The internal diameter of the EMT is less than 3/4″.