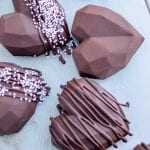
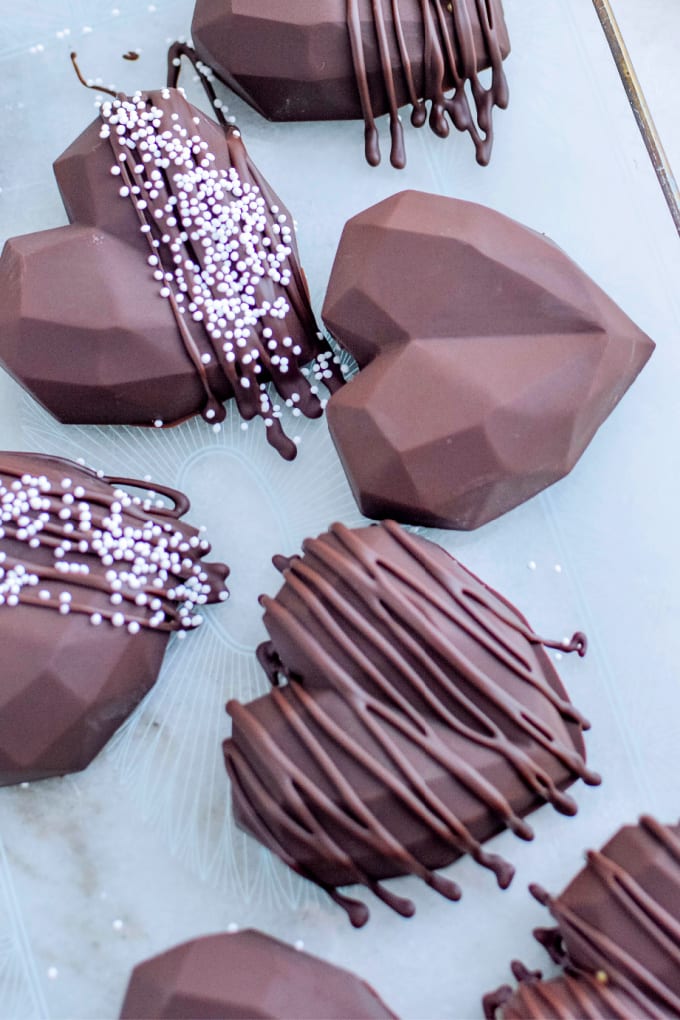
Homemade Chocolate Peanut Butter Cups

Everyone loves a peanut butter cup, but did you know you can make them at home? These Homemade Chocolate Peanut Butter Cups are delicious and easy to make!
Raise your hand if you love those heart-shaped peanut butter cups you can find in the store right now. I’m betting your hand is in the air – mine sure is! Guess what? You don’t have to buy them; you can make them. Really. You can make homemade chocolate peanut butter cups yourself.
Let me show you how to make homemade peanut butter cups and wow your sweetheart this year. It’s much easier than you think and oh so delicious. So delicious in fact, you may keep them all to yourself.
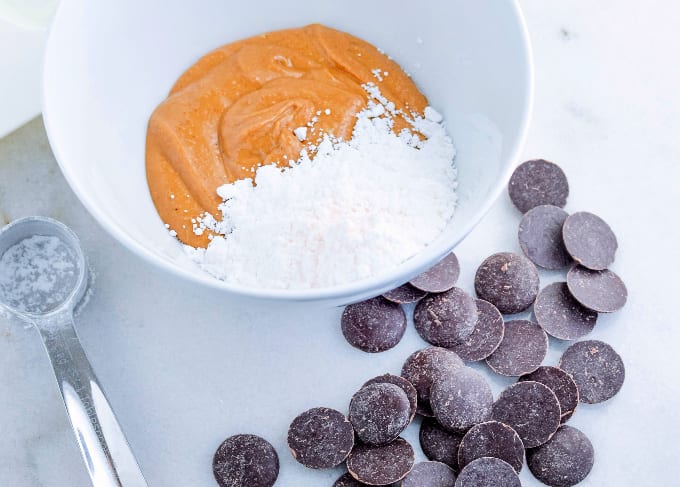
Ingredients
- Dark chocolate wafers
- Natural peanut butter, smooth
- Powdered sugar
- Salt
- Pure vanilla extract
- Optional: Tiny nonpareils
Equipment
As an Amazon Associate, I earn from qualifying purchases. Be sure to check out my Juggling Act Mama Storefront on Amazon where you’ll find all kinds of great products to make your life easier! Thanks so much for being a part of Juggling Act Mama ❤
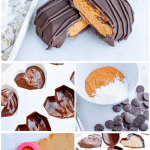
Instructions
- Mix the peanut butter, powdered sugar, salt, and vanilla until smooth. Transfer the peanut butter mixture to one half of a piece of parchment paper and place in the freezer for about 20 minutes.
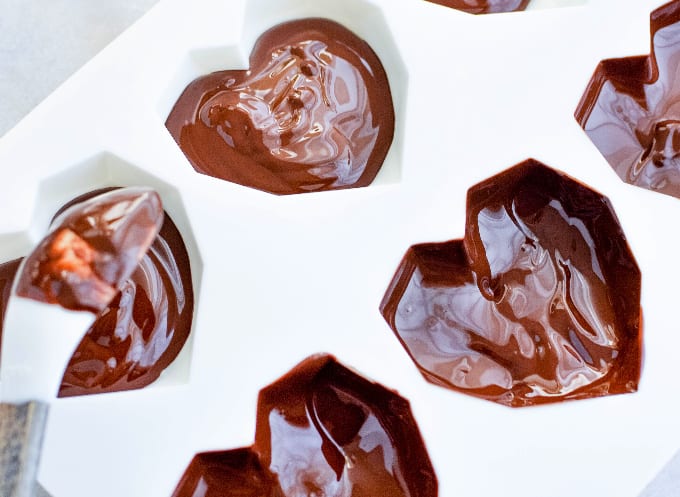
- Melt the chocolate to package instructions and carefully smooth it into each corner of the heart molds.
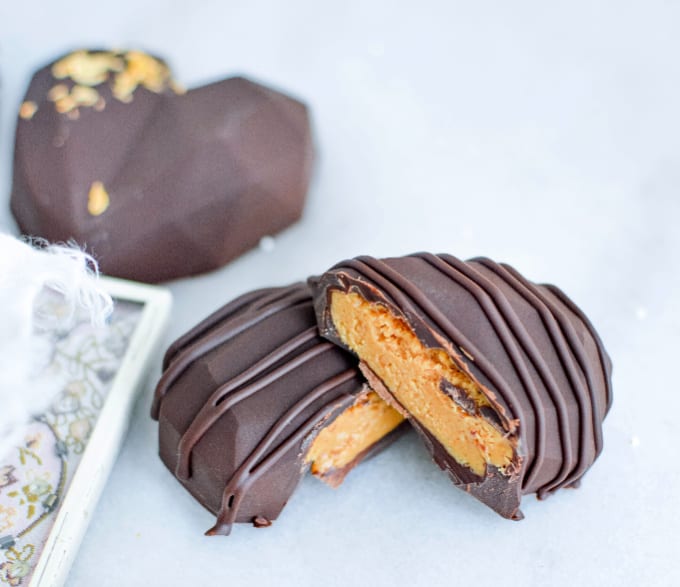
- Remove the filling mixture from the freezer and cut out hearts that will easily fit into the center of the molded chocolate hearts.
- The chocolate should still be very liquidy and the peanut butter hearts should easily push right into the chocolate. Try to press them in just enough that they are in all the way but not so far that they would likely push through.
- Pour the rest of the chocolate over the hearts and carefully smooth it out.
- Set into the freezer to chill for about 20 minutes.
- Remove the completely solid hearts from the mold.
- Set the hearts right onto the same cold/frozen tray that the silicone mold was on in the freezer.
- Use the remaining melted chocolate to drizzle over the top.


Similar Recipes
There’s not much better than the combination of chocolate and peanut butter when it comes to treats, in my humble opinion! Here are some more great recipes you might enjoy:
- Peanut Butter and Chocolate Chip Blondies
- Old Fashioned Chocolate Peanut Butter Fudge
- Peanut Butter Oatmeal Chocolate Chip Cookies
- Chocolate Peanut Butter Cup Bark
- Peanut Butter Pretzel Bites

Homemade Peanut Butter Cups
Not ready to make your own chocolate peanut butter cups yet? Don’t forget to pin the recipe for later!
When you do make it, please be sure to tag me on Instagram @jugglingactmama or #jugglingactmama – I’d love to see your pictures! And finally, if you get a chance, please comment and leave me a ⭐⭐⭐⭐⭐ rating below!

Homemade Chocolate Peanut Butter Cups
As an Amazon Associate, I earn from qualifying purchases.
Ingredients
- 1½ cups dark chocolate wafers divided so you have some to drizzle on the top after as well
- 6 oz natural peanut butter smooth, and stirred really well to ensure there isn’t any peanut oil visibly present.
- 3½ tablespoons powdered sugar
- pinch Salt
- 1 teaspoon pure vanilla extract
- tiny nonpareils optional
- dark chocolate for drizzling optional
Instructions
- Mix the peanut butter, powdered sugar, salt, and vanilla until smooth. Fold a piece of parchment paper in half. Transfer the peanut butter mixture to one half and fold the other side of the paper over so the peanut butter is in the middle of the two sheets. Smooth the peanut butter mixture to an even ½ inch thickness. Set this in the freezer for about 20 minutes. While that is chilling you can start with the chocolate.
- Melt the chocolate to package instructions and carefully smooth it into each corner of the heart molds with a small rubber spatula. You want to have a solid and even coating on the hearts. To check coverage, carefully turn the mold around and look at it from each direction. Make sure no spots are missed. I like to have the silicone mold on a tray or plate while doing this as it helps with stabilizing the tray while the chocolate is setting up. You will have plenty of chocolate left over in your melting dish after this step, you will use this in the next steps. Leave the tray on the counter while the peanut butter filling chills.
- Remove the filling mixture from the freezer and freehand cut, or use a cookie cutter to cut out hearts that will easily fit into the center of the chocolate hearts.
- The chocolate should still be very liquidy and the peanut butter hearts should easily push right into the chocolate. Try to press them in just enough that they are in all the way but not so far that they would likely push through the chocolate top.
- Pour the rest of the chocolate over the hearts and carefully smooth out so the chocolate evenly fills all of the space around and over the peanut butter filling. Aim for a flat bottom.
- Set into the freezer to chill for about 20 minutes.
- Remove the completely solid hearts from the mold. I like to use food-safe gloves to avoid fingerprints.
- Set the hearts right onto the same cold/frozen tray that the silicone mold was on in the freezer.
- Use the remaining melted chocolate to drizzle over the top of some or all of the hearts.
- Optional: Top with nonpareils.
- Store in an airtight container for up to a week.
Equipment
- Silicone heart shaped mold
- Parchment Paper