Easy Homemade Ice Cream

Our easy homemade ice cream recipe is a nod to old fashion ice cream and one that is easily adapted to fit everyone’s tastes by adding fun mix-ins and toppings!
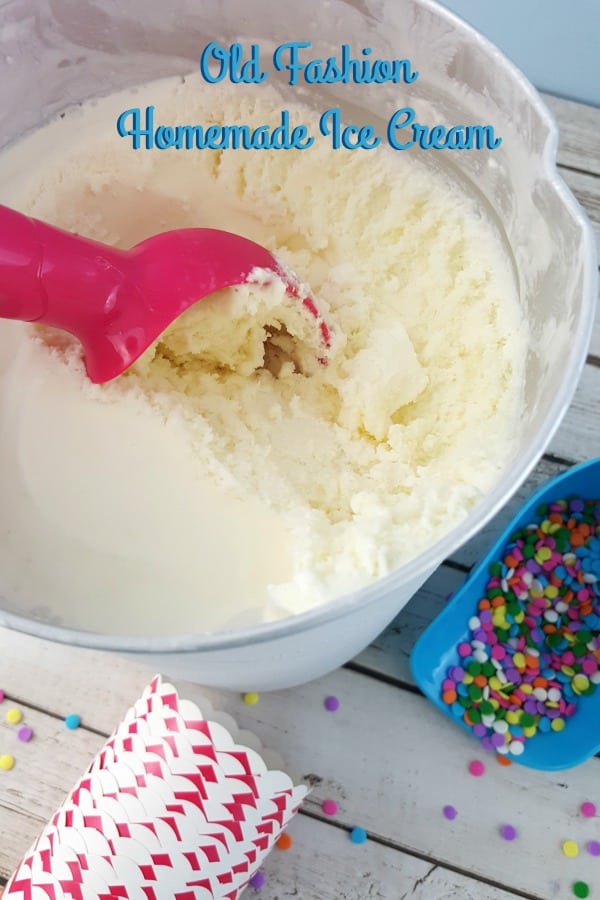
When I was a little girl, my Dad would sometimes make ice cream for us in an old fashion style ice cream maker. It was wooden with a motor (not hand cranked), and incredibly loud. The result was always the most amazing ice cream I’d ever tasted.
Today’s ice cream makers have come a long way. This really is easy homemade ice cream that you’ll want to make again and again! This recipe has just 5 easy ingredients for a classic creamy vanilla ice cream.
Ingredients
- Whole Milk
- Whipping Cream
- Vanilla Extract
- Lemon
- Sugar
Instructions
This is meant to be a brief overview of the recipe. For step-by-step instructions and a full printable recipe card with ingredients, please scroll down to the teal box below or Jump to Recipe.
- In a large mixing bowl, whisk together the sugar, milk, cream, vanilla extract and lemon juice.
- Pour the mixture into the ice cream machine canister, insert the dasher, and secure the lid tightly.
- Place the canister into the center of the bucket. Assemble the motor over the canister with the dasher shaft inserted into the hole in the bottom of the motor.
- Turn the motor counter clockwise to lock the motor onto the bucket. Place the bucket into the sink.
- Plug in the power cord. Allow the mixture to churn for a couple minutes before adding ice to the bucket.
- Unplug the motor. Add about 2 inches of ice to the bottom of the bucket and sprinkle on about a 1/2 cup of the rock salt. Repeat the layers until the bucket is completely full.
- Plug the motor back in and allow the ice cream to churn for 20-40 minutes, or until the machine slows or stops on it’s own. Keep an eye on it and add more ice as needed.
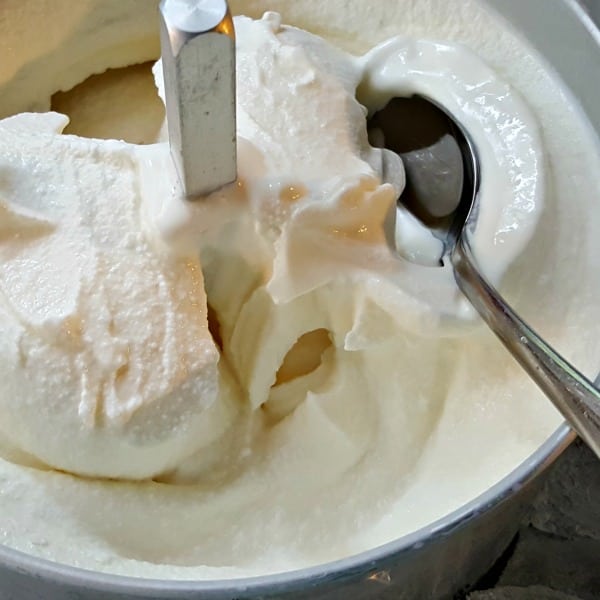
- Remove the canister. If you wish to mix in items such as fresh berries, chocolate, nuts, etc, do so now with a long-handled rubber spatula.
- Replace the lid, insert the storage plug, and put the canister into the freezer for 1-2 hours before serving.

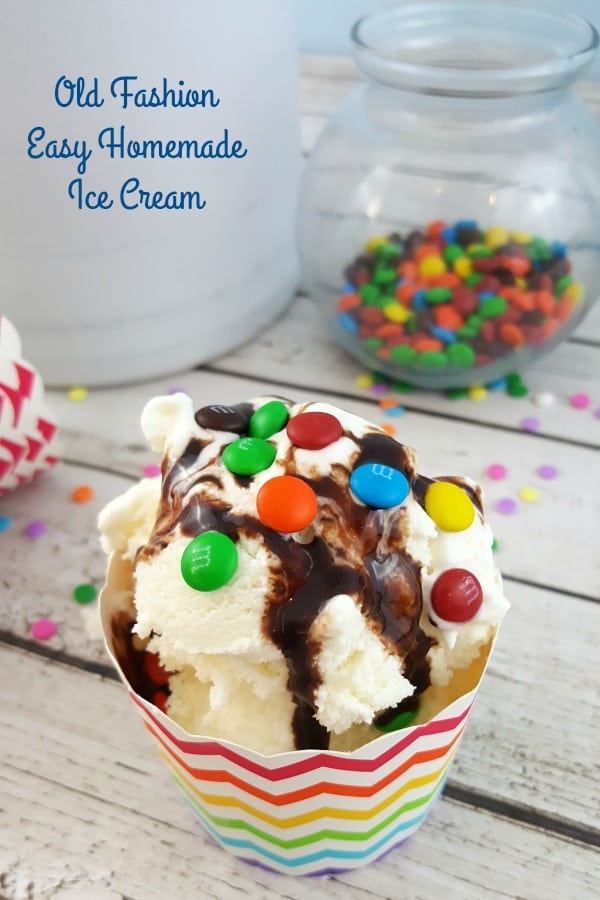
Toppings and Mix-in Ideas
My Dad always topped his ice cream with pure maple syrup, which is pretty delicious. Here are some other ideas for Toppings and Mix-ins to make this easy homemade ice cream even tastier!
- M&M Candies or Mini Chocolate Chips
- Chocolate Peanut Butter Fudge
- Fresh Strawberries, Raspberries or Blueberries
- Crushed Cookie Sandwiches
- Homemade Peanut Butter Topping
- Chopped Candy Bars
- Peanut Butter Caramel Sauce (this this dip out with a little heavy cream for a yummy sauce)
More Delicious Recipes
- Strawberry Pina Colada Smoothie
- Black Cherry Ice Cream
- No Churn Ice Cream
- Red Velvet Ice Cream with Cream Cheese Swirl
- Ice Cream Sandwiches
- Cotton Candy Flavored Ice Cream
Easy Homemade Ice Cream
On hot summer days, no one wants to be slaving away in a hot kitchen. The weather demands easy homemade ice cream, and this recipe delivers!

Easy Homemade Ice Cream
As an Amazon Associate, I earn from qualifying purchases.
Ingredients
For the Ice Cream Base
- 3 cups granulated sugar
- 3 cups whole milk
- 6 cups whipping cream
- 1 tablespoon vanilla extract
- 2 tablespoons lemon juice
For the Ice Cream Maker
- 8 lbs ice
- 3 cups rock salt
Instructions
- In a large mixing bowl, combine the sugar, milk, cream, vanilla extract and lemon juice. Whisk until mixed through.
- Pour the mixture into the canister, insert the dasher, and secure the lid tightly.
- Place the canister into the center of the bucket. Assemble the motor over the canister with the dasher shaft inserted into the hole in the bottom of the motor.
- Turn the motor counter clockwise to lock the motor onto the bucket. Place the bucket into the sink.
- Plug in the power cord. Allow the mixture to churn for a couple minutes before adding ice to the bucket.
- Unplug the motor. Add about 2 inches of ice to the bottom of the bucket and sprinkle on about a 1/2 cup of the rock salt. Repeat the layers until the bucket is completely full.
- Plug the motor back in and allow the ice cream to churn for 20-40 minutes, or until the machine slows or stops on it’s own. Keep an eye on it and add more ice as needed.
- Remove the canister. If you wish to mix in items such as fresh berries, chocolate, nuts, etc, do so now with a long-handled rubber spatula.
- Replace the lid, insert the storage plug, and put the canister into the freezer for 1-2 hours before serving.
Notes
- Chocolate Chips
- Fresh Strawberries, Raspberries or Blueberries
- Crushed Cookie Sandwiches
- Sprinkles or “Jimmies”
- Chopped Candy Bar Pieces
- Mint Chocolate Chips
- Walnuts, Pecans, or Other Nuts
I remember when I was small by mamas parents came often. They lived about 25 miles from us and granddaddy was in charge of the ice cream maker once the mix was inside. Then he used the crank kind and vanilla was usually what was made. My mamas sister and her husband visited from Kansas as often as they could and they always had to have a flavored ice cream, like peach, strawberry, etc.
when I graduated college and got married my husbands family loved home made ice cream but never attempted it. So I made it when we got together during warm months. I had the automatic kind and it wasn’t difficult. But I remember putting eggs in mine and yours didn’t have eggs. I like most ant kind but vanilla or caramel or a chocolate/coffee flavor are my favorites thanks so much.
Thank you for sharing your memories with me! This is a simplified recipe, but the booklet that comes with the machine does offer a custard base recipe that includes eggs. This mixture is cooked on the stovetop and chilled overnight, which I didn’t want to bother with this time around.
I made the vanilla recipe listed here and it is wonderful. Very creamy and rich. I was dubious about the lemon juice but it was the best vanilla recipe I have tried. Thank you Ang!
Thank you for the ice cream recipe, it’s very good.