DIY Easy Paper Flowers


Create beautifully patriotic decorations with our DIY easy Paper Flowers DIY tutorial! These can be customized for any holiday or special occasion.
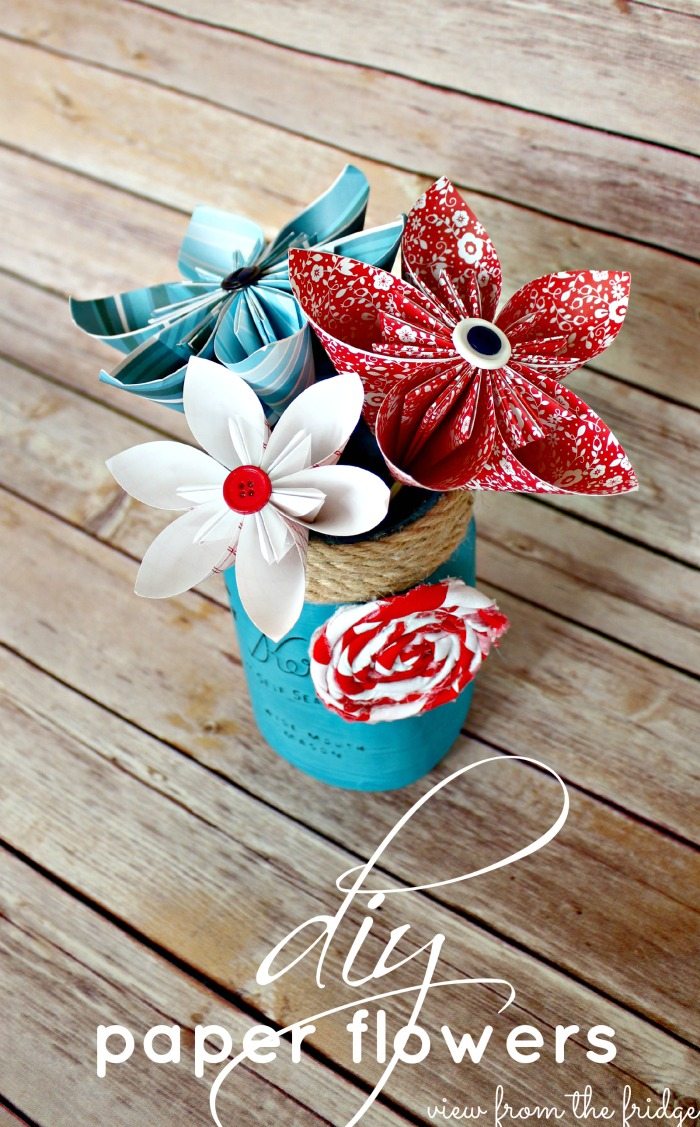
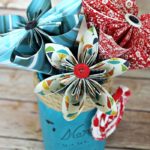
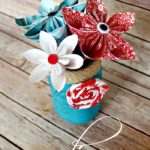
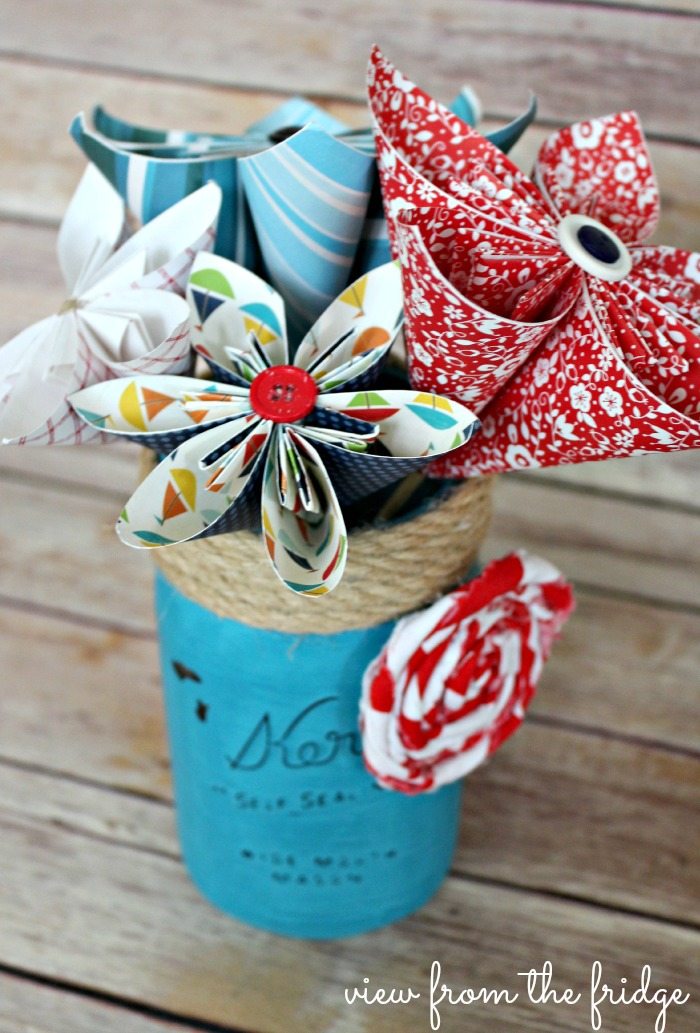
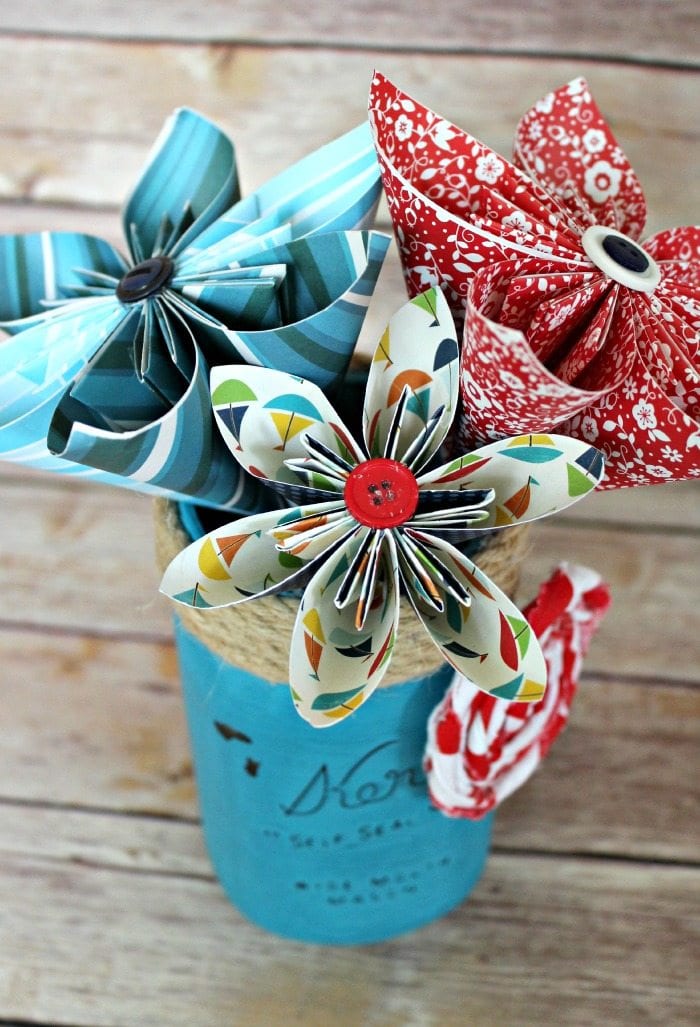
I adore fresh flowers, but hate that they go by so quickly. With this Paper Flowers DIY project, you do not have to worry about your centerpieces fading away!
Hello there, Juggling Act Mama readers! It’s Katie from View From The Fridge back today to share a fun and easy craft. I think you’re really going to love these!
There are quite a few different tutorials for DIY paper flowers out there, but I’m pretty sure this is about the easiest version!
A couple of folds, some hot glue, and a button to top it off, and you’re done. You will have beautiful flowers that don’t die! They will actually last quite a long time (and don’t need water!) if you store them carefully in between use.
This project is perfect for a variety of events:
✔ Memorial Day
✔ 4th of July
✔ Labor Day
You can also customize them with different colors and patterns for other events and holidays like birthday parties, baby showers, Easter, Thanksgiving, and even weddings.
I am kind of a hoarder when it comes to lovely scrapbook papers! These sets would also make gorgeous centerpieces!
PIN IT HERE!
Materials for Making Paper Flowers
- Patriotic scrapbook paper, preferably double-sided
- Wooden skewers OR extra-long Lollipop sticks
- Hot glue gun and glue
- Button(s) or other embellishments for the centers
What kind of paper is used for paper flowers:
Medium-weight Scrapbook paper is best for making DIY easy paper flowers.
How do you make paper flowers?
- Out of your scrapbook paper, cut a square (~5″), then cut this in half diagonally to form two triangles
- Using one triangle, fold both ends into the center to meet in the middle as shown
- You should now have a perfect square.
- Fold down each corner as shown
- From the center, fold the paper so each center edge is now matched up with the outer edge
- Curl the paper so that each edge meets in the middle. Repeat these 6 steps 6 times to form 6 petals.
- Get out the hot glue gun and apply hot glue to your dowel rod/skewer/lollipop stick
- Glue each petal onto the skewer as shown
- Six petals glued onto the top of the skewer
- Hot glue a button onto the center to cover the top of the skewer
Please note, we do NOT recommend children helping with the hot gluing portion. Instead, get them involved in choosing the paper and arranging the finished flowers.

More DIY Decoration Ideas
- Tissue Paper Flowers are fun and easy to make also.
- Learn how to make Paper Butterflies, which also make lovely decorations!
- These paper pinwheels pictured below are similar to our DIY easy paper flowers, however, they use a slightly different technique.

Also be sure to check out our decorative pinwheel tutorial as well as our chalk painted mason jars which are perfect for centerpieces.
Fun Summer Projects for Kids
- Our Watercolor Canvas Photo Project is a great summer project for tweens and teens kids.
- Make fluffy 2-ingredient slime that is super easy and even edible!
- Teach the kids about reusing with this upcycled Patriotic Wind Chime.

How to Make Paper Flowers
As an Amazon Associate, I earn from qualifying purchases.
Equipment
- Hot glue gun and glue
Materials
- Patriotic scrapbook paper, preferably double-sided Medium-weight Scrapbook paper is best for making DIY easy paper flowers.
- Wooden skewers OR extra-long Lollipop sticks
- Button(s) or other embellishments for the centers
Instructions
- Out of your scrapbook paper, cut a square (~5″), then cut this in half diagonally to form two triangles
- Using one triangle, fold both ends into the center to meet in the middle as shown
- You should now have a perfect square.
- Fold down each corner as shown
- From the center, fold the paper so each center edge is now matched up with the outer edge
- Curl the paper so that each edge meets in the middle. Repeat these 6 steps 6 times to form 6 petals.
- Get out the hot glue gun and apply hot glue to your dowel rod/skewer/lollipop stick
- Glue each petal onto the skewer as shown
- Six petals glued onto the top of the skewer
- Hot glue a button onto the center to cover the top of the skewer
Love these Katie! You’re so creative and talented!
Thanks, Ang, and thanks for having me!
I love these colorful flowers! Thanks for the awesome tutorial {step by step with pictures is always welcome}! Pinning and making these for something crafty really soon!
~ Ashley
Hi Ashley! Thanks so much for stopping by! It’s such an easy fun craft!
Love these flowers!! They are so super cute!! I have tons of scrapbook paper. Great way to use it! Thanks so much!! Pinned 🙂
Thanks so much, Crystal!! I can’t wait to make more with all the paper I have, too!
Super cute! It’s on my to do list to learn how to make paper flowers
Hi Paige! It’s so super simple … I can’t believe I’ve never made them before now! Thanks for stopping by and for the note!
XO,
Katie
Thanks so much! Such an easy, quick project!! Thanks for stopping by!
XO,
Katie
Thanks, Melissa! I have so much random scrapbook paper, that I’m glad I found a use for some of it!! Thanks for stopping over!
XO,
Katie
These are so cute Ang! Sharing on my FB page today!
Hermosas flores, GRACIAS!! por enseñar hacerlas.- Desde Argentina.-
(Beautiful flowers, THANK YOU !! for teaching to do them.- From Argentina.-)