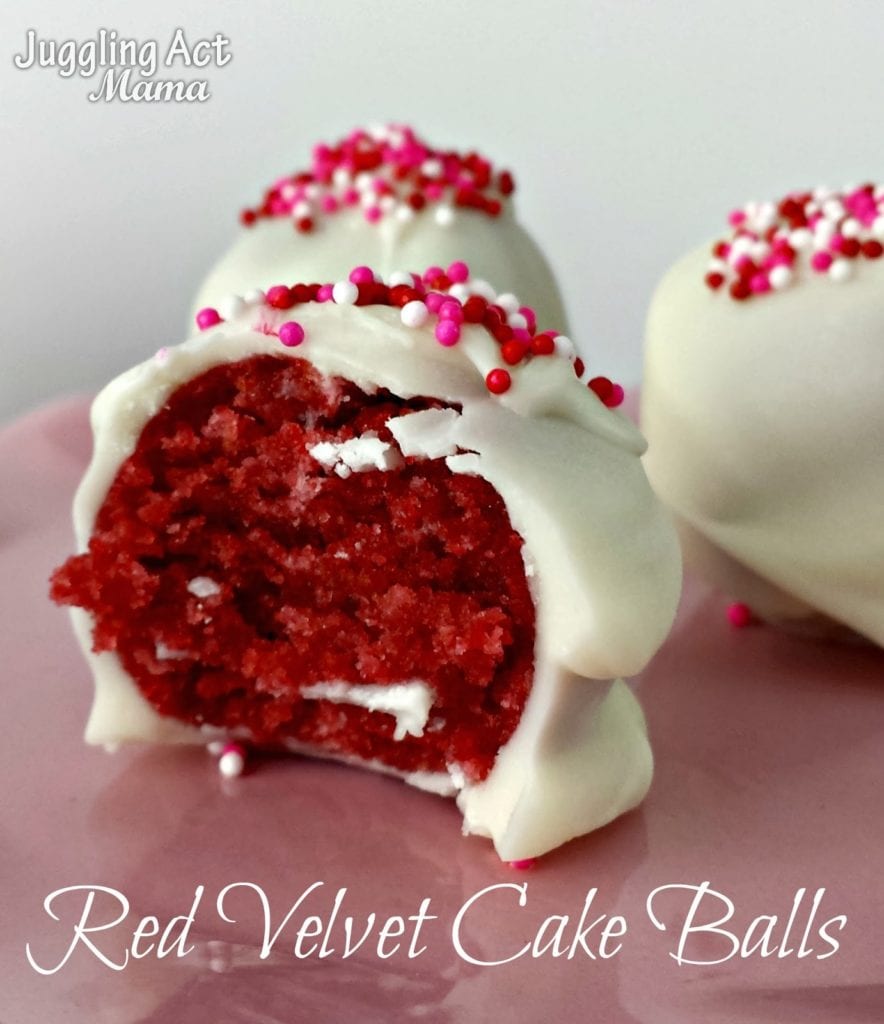
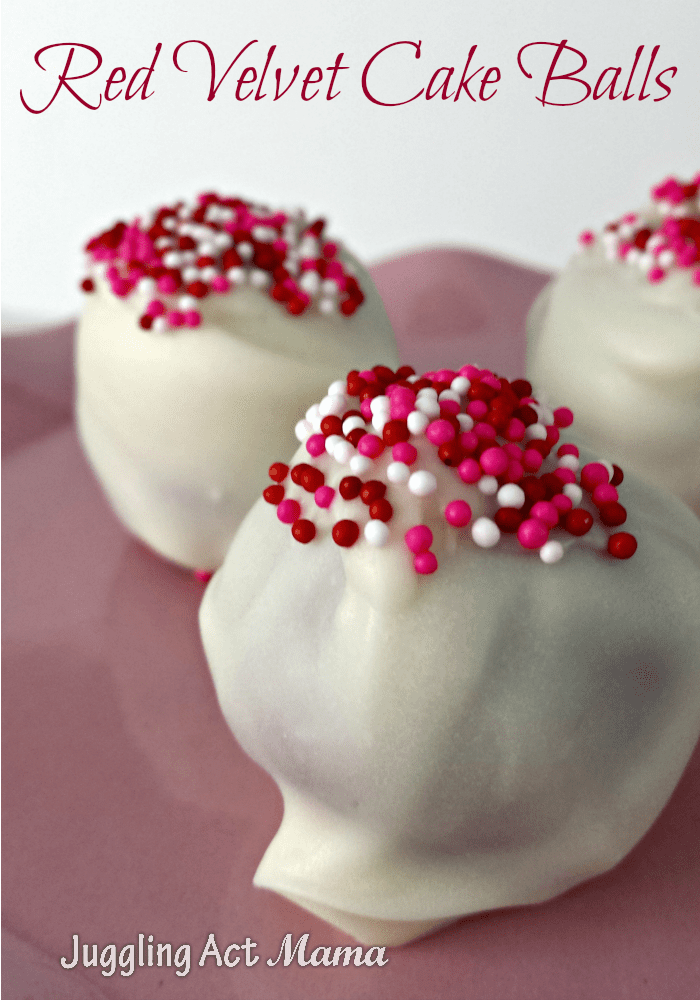
Red Velvet Cake Balls


Red Velvet Cake Balls are a delicious treat you can make for the holidays, Valentine’s Day, or really any time. They make a great treat for birthdays and other parties, too.
(You might want to try these Pumpkin Cheesecake Truffles next time!)
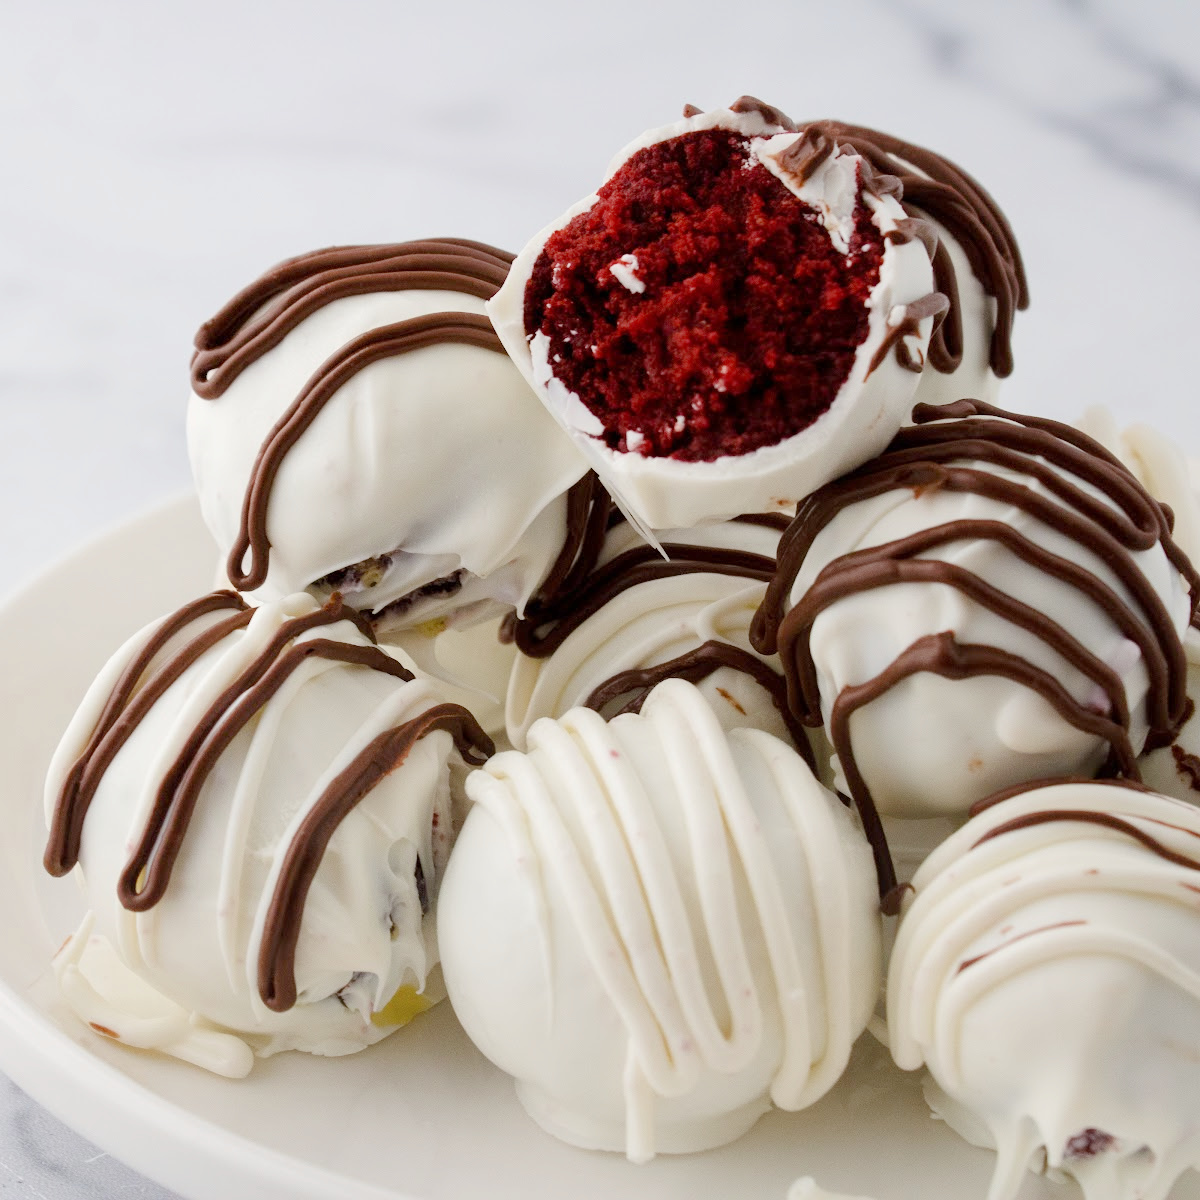
Cake balls are sometimes also called cake truffles and these red velvet ones are my favorite! They are deliciously decadent two-bite morsels of cake and frosting and chocolate. You’re going to love these, and so will your sweetheart!
Making cake balls can be time-consuming, which is why I start with a boxed mix. You can use your own homemade cream cheese frosting, or pick up a can at the grocery store. Either way, you’re going to love this incredibly delicious Red Velvet Cake Balls recipe.
Cake balls are so much easier to make than cake pops because you don’t have to worry about them staying on the stick. How gloriously amazing to mix red velvet cake with cream cheese frosting and cover it with white chocolate. It’s downright sinful, which is perfect for a day that’s all about love!
While I don’t recommend having kids help with the candy melts, making the cake rolling the cake balls, and of course adding sprinkles are all fun ways to get the kids involved.
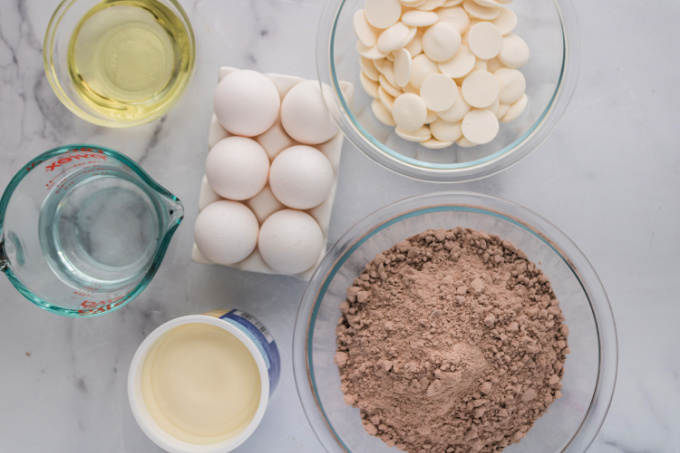
🧂 Ingredients
You only need a few simple ingredients to make these red velvet truffles:
- boxed red velvet cake mix + ingredients on the box
- cream cheese frosting (homemade or store-bought)
- White Candy Melts
- Sprinkles
How to Make Red Velvet Cake Balls:
Equipment
The following are affiliate links. We are a participant in the Amazon Services LLC Associates Program, an affiliate advertising program designed to provide a means for us to earn fees by linking to Amazon.com and affiliated sites.
These are my favorite tools for making cake balls:
- 3-Piece Glass Mixing Bowl Set
- Silicone Spatula Set
- Stand Mixer
- 9×12 OR 9×13 Baking Pan
- Parchment Paper or Wax Paper
- Large Baking Sheet
- Medium Cookie Scoop (1-1/2 tablespoon scoop)
- I find that Candy Dipping Tools can be very helpful and are worth the small investment if you do a lot of chocolate chipping. You can also just use a large fork.
Be sure to check out my Juggling Act Mama Storefront on Amazon where you’ll find all kinds of great products that will make your life easier! Thanks so much for being a part of Juggling Act Mama ❤
Tips for Using Candy Melts
- Carefully read the directions on the back of the package of candy melts before you begin.
- Keep in mind that microwave cooking temperatures vary. You can always add more time, so start small.
- I love this 3-Piece Glass Mixing Bowl Set – the smallest (1 quart) bowl is perfect for melting chocolate, while the large bowl is perfect for the cake ball mix.
- Use a rubber spatula like the one in this Silicone Spatula Set to mix the chocolate.
- Handle the bowl and the chocolate with care. These are very hot when melted. Use oven mitts.
- Always supervise children around hot melted chocolate to avoid burns and spills.
😋 Similar Recipes
You might also enjoy one of these other cap pop or cake ball recipes so next time be sure to try one of these:
- Brownie Truffles – a decadent, chocolatey twist on a cake ball.
- Pumpkin Cheesecake Truffles – this recipe was a viral sensation and perfect for fall.
- Oreo Truffle Balls – a must try if you love chocolate and cream sandwich cookies.
- Gold Cake Pops – festive for anniversaries or St. Patrick’s Day.
If you love Red Velvet like me, you’ll want to check these out also:
Variations
Red Velvet Cake Bites can also be made with vanilla frosting.
Use white chocolate chips instead of candy melts, and add a little bit of coconut oil to help it melt smoothly. You can also use milk chocolate or dark chocolate if you like.
Biting into one of these you have the crack of the chocolate and then the dense texture of the red velvet cake and frosting in the middle. I could go on and on about my love for these sweets!?

Red Velvet Cake Balls
As an Amazon Associate, I earn from qualifying purchases.
Ingredients
- 1 box red velvet cake mix prepare and bake in a 13×9 pan as per box directions
- 1 can cream cheese frosting
- 1-2 bags white chocolate candy melts
- Sprinkles optional
Instructions
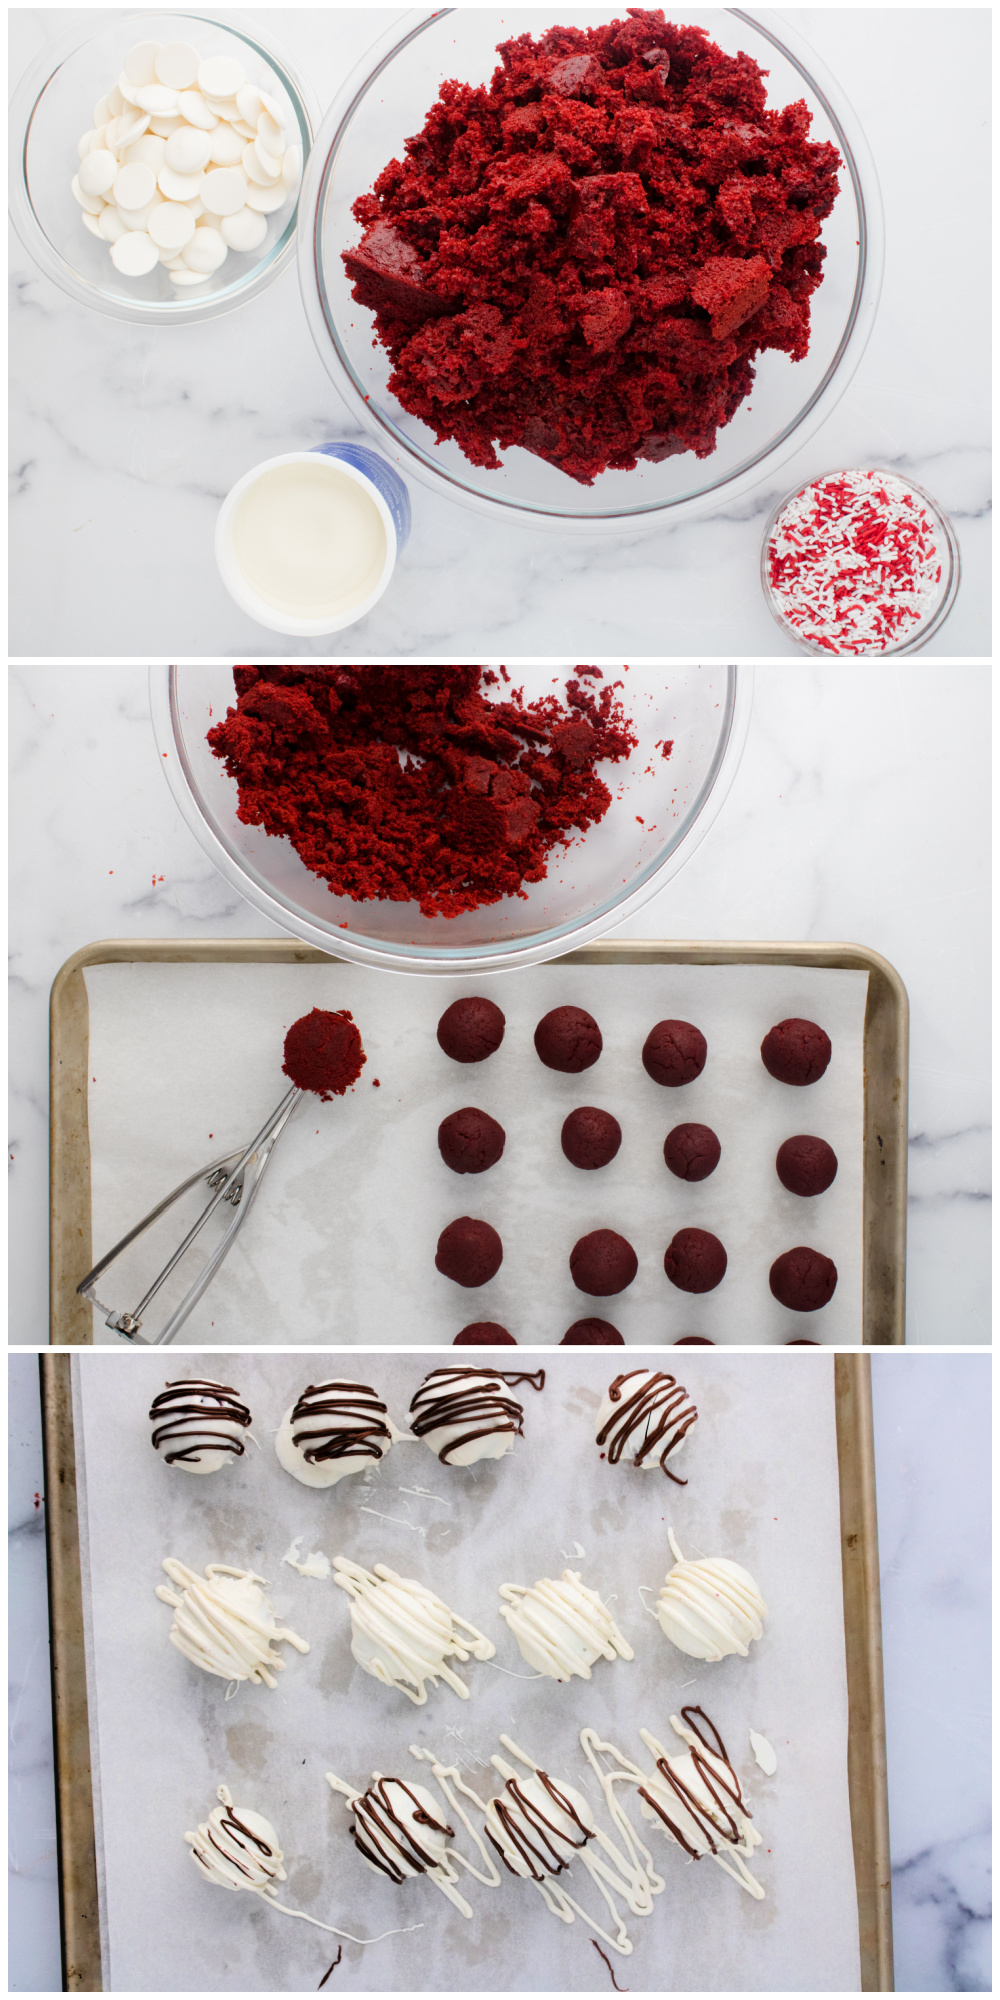
- After you prepare the cake using the instructions on the box, let it cool completely.1 box red velvet cake mix
- Line two baking sheets with parchment paper.
- Crumble the cake into a large mixing bowl. Stir in the cream cheese frosting until the mixture is well combined.1 can cream cheese frosting
- Using a Medium Cookie Scoop to help portion, roll the mixture into balls using your hands. You should get about 50 or so balls. Put the the tray into the freezer for 15-20 minutes so the balls can set.
- Remove the balls from the freezer to the counter.
- In a microwave safe bowl, melt about a third of the chocolates according to the directions on the package.1-2 bags white chocolate candy melts
- Using a fork, dip the cake balls into the melted chocolate.
- Carefully tap the fork against the edge of the bowl and allow the excess chocolate to drip off.
- Transfer to a second baking sheet lined with parchment paper, using a toothpick to help slide the cake ball off the fork.
- Immediately add sprinkles.Sprinkles
- Refrigerate the cake balls 20-30 minutes until the chocolate is hardened.
- Store leftovers in an airtight container in the refrigerator for 2-3 days.
Equipment
- Parchment Paper
Video
Notes
Nutrition
Delicious!! When the balls are finished being rolled, and put into the freezer, can they be left over night, and dipped and decorated the next day (when there is more time)??
Good question – yes, but you need to make sure the balls are not too cold. I would put them in the refrigerator overnight versus the freezer.
You put the whole can of frosting or just a portion?
Hi Jocelyn, you only put in enough to make the cake mixture stick together. Different cake recipes can mean that cakes have difference consistencies, which is why I don’t give an exact amount.
Think of it this way, you want the cake to stick together and be moldable, but you don’t want it to be a gloppy frosting mess. 🙂
Can these be frozen and dipped another time? I read on another recipe that they can be frozen up to 2 months??can’t wait until I make them! Thanks
Hello Bernadette, please forgive the late reply! I have never tried freezing them before so I’m not sure in all honesty.
If you try it, please let me know!
Can these be frozen after dipping?
Hi Terri,
I have not tried freezing them after dipping, so I can’t say for sure. My concern would be that the chocolate coating would crack off, but since I haven’t tested it, I’m afraid I cannot answer your question. Please do let me know if you give it a try!
My mom and I made these a week ago and I have kept mine in the freezer and they are still really good!!
Thanks for letting me know, Kristen!
I made these last night. They turned out perfect! They’re so good that I had to hide them from myself in the back of the fridge so I won’t eat them all!
Hi Sandy! I’m so glad you had a chance to try these and liked them!
Thanks for stopping by and leaving me a comment 🙂
How long does the it take before the chocolate coating start to melt if left out at room temperature?
Hi Kaye! They won’t ‘melt’ unless it is very hot, but they may start to get a little soft and therefore, messy.
I probably would not leave them out more than 2-3 hours at room temperature. Enjoy!
Hi I was wondering if you can use different kind of other cake boxes??
Yes, you absolutely can 🙂
ENJOY!
Hi! Could I use Almond Bark instead of Candy Melts for dipping? Thanks!
I haven’t tried it with Almond Bark Heidi, but I think it would probably be fine.
Hi . These are delicious. How advance can I make these?
Hi Melissa! I’m so glad you enjoyed these! I find that storing them once they’ve been dipped for longer than a day or two can be tricky. However, the cake balls themselves can be made 4-5 days before you want to dip them in the chocolate.
I want to make these for a Superbowl party since it is so close to Valentines day this year. Can I use white chocolate chips instead of candy melts. I have an over abundance left from Christmas.
Yes, white chocolate chips will work also. Place the, in a microwave-safe bowl. I recommend working in small batches. Microwave for 30 seconds, stir ad melt for another 20 seconds, then stir again. At this point, you repeat the process until the chocolate is smooth. Enjoy!
How do I mail these to my grandkids? I’m making them for valentines day. I live in Northern California & they live in Southern California.
Hi Pam, I’ve never tried to send these in the mail before. If you were mailing between cold-weather states in winter, I think it would be okay, but I don’t know about warm-weather states. If you try it, I’d love to know how you make out.