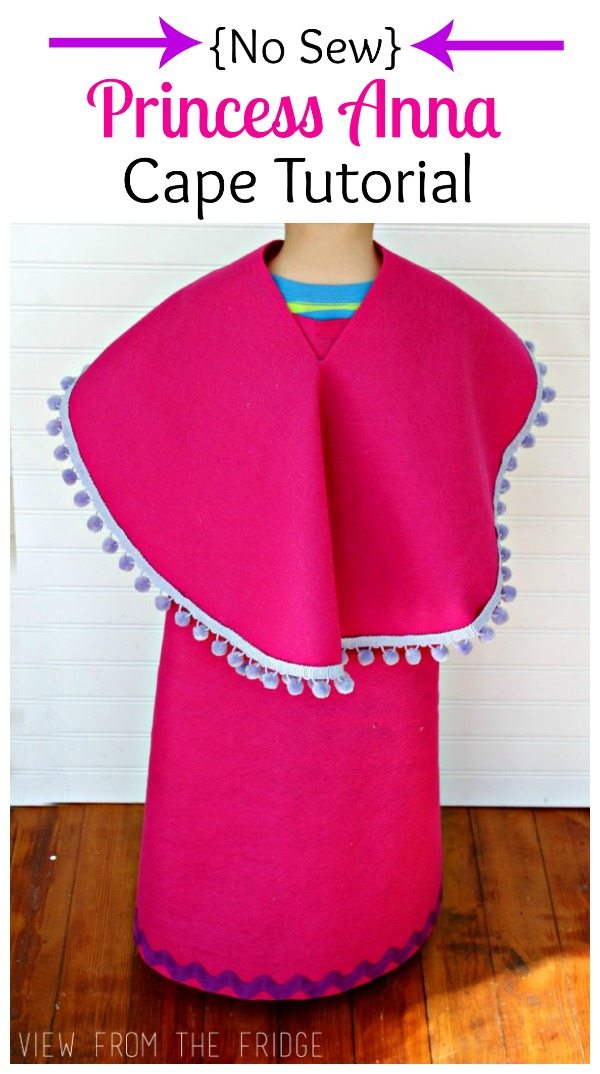
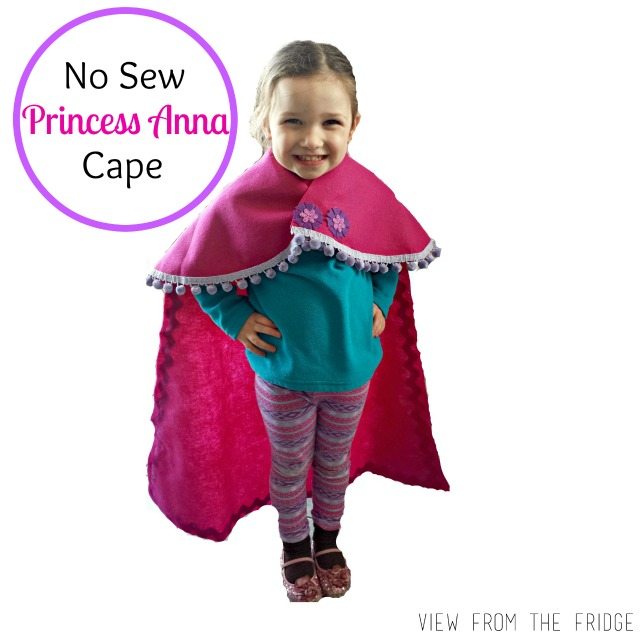
Frozen Anna Cape (No Sew)
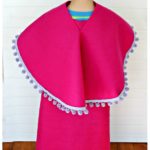

This a quick and easy craft that will surely be the highlight of your child’s day Our NO SEW Frozen Anna Cape is perfect for dress-up time or Halloween.

You might also want to check out our Elsa Cape Pattern.
I realize it’s not Halloween, but most kids I know like to dress up any ol’ time of the year! And especially on their birthday… and especially as one of their favorite Princesses, right?
It’s Katie from View From The Fridge back this month with a fun project that I worked on for Ang’s daughter, Olivia. She just celebrated a birthday a couple weeks ago, and Ang mentioned that Olivia would love a Princess Anna Cape to go along with the Elsa cape we made for her last fall (check out the details HERE). And … since it’s all boys around my house, and I get little time to make things involving pink and purple … I jumped on the chance to make this for Olivia!
It actually turned out to be a super simple project, and the best part is … there’s no sewing involved!! Like NONE. ZERO. Which is fabulous for me because me sewing machine is buried under a pile of ‘projects’ in my craft room at the moment!
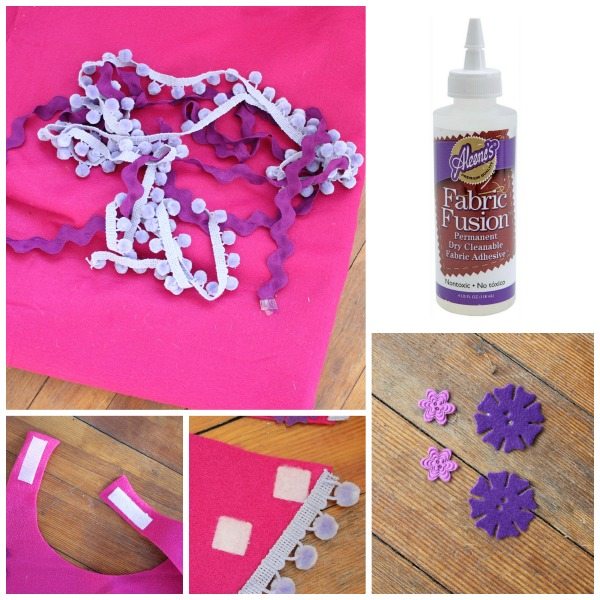
✂️Supplies Needed
Be sure to check out my Juggling Act Mama Storefront on Amazon where you’ll find all kinds of great products to make your life easier! Thanks so much for being a part of Juggling Act Mama ❤
Here’s what you’ll need for the Anna cape:
- 1.5 Yards of Pink Felt
- 2 Yards of light purple pom pom trim (similar to picture above)
- 2 yards of darker purple ric rack trim
- Fabric Fusion (this works in place of the sewing machine!)
- ~2″ strip of velcro for neckline
- 2 sets of square velcro.
- Embellishments for front of cape (I found the items purple felt flower ‘buttons’ at JoAnn Fabrics in a pack of assorted shapes).
- Iron
- Scissors
📝Instructions
This is meant to be a brief overview of this Frozen Anna Cape project. For step-by-step instructions and a full printable tutorial with materials, please scroll down to the teal box below.
The ‘cape’ is actually two pieces. A bottom, longer piece that looks like a traditional ‘cape’, and a round, fuller, and shorter ‘capelet’ that goes over the top.
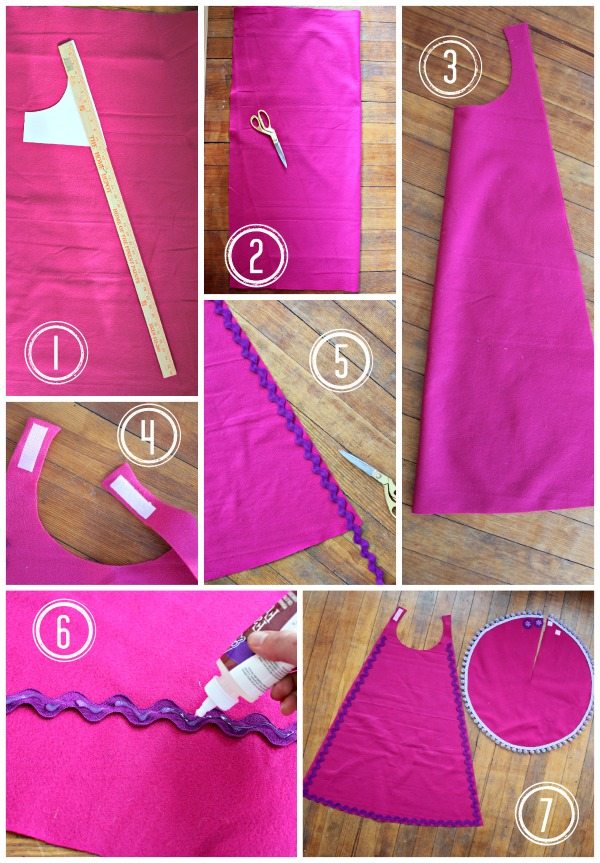
To start … make the top round piece as shown:

- First, you’ll need to make a template for drawing a 24″ diameter circle. I used a 12″x 12″ sheet of scrapbook paper and traced a 1/4 circle out of it as shown.
- I cut out this 1/4 circle.
- Then traced it onto the felt to complete a full circle (by flipping it over, then over again, and over once more until a full circle was drawn.
- Cut out the circle
- Then cut a 12″ slit in your circle as shown.
- Next, grab your Fabric Fusion and pom pom trim, and ‘glue’ the trim all along the outside of the circle. This ‘glue’ (the Fabric Fusion) takes a little bit of time to dry, so use pins to hold the trim in place while it sets.
- Next, add your velcro squares to the opening as shown. Secure these with the Fabric Fusion as well.
- Your circle cape should look similar to the picture in step 8 now.
- For extra fun (and this is totally optional), I added these felt flower embellishments that I found at JoAnn. I secured these to one another and then to the cape as shown with the Fabric Fusion.
- The top piece is complete … let the Fabric Fusion set overnight, and all your pieces should be secure in the morning!
Now for the longer part of the cape:
- I used this neckline template, and then extended the length of the cape a full 36″ (modify this length depending on how tall your child is).
- After tracing half the cape (neckline and length), I folded my felt in half (so I could cut once and have a full symmetrical cape)!
- Cut along the lines you traced.
- Add the velcro strips to the neckline with the Fabric Fusion similar to how you make the round piece above.
- Next, cut your ric rack trim to fit down the length of each side and across the bottom.
- Apply Fabric Fusion to trim and pin into place along outer edge of cape.
- Done! Allow the Fabric Fusion glue on both pieces to set.
Here’s how the cape should look from the back:
And again from the front again… isn’t that a cute little princess from Arendelle?
More Frozen-Inspired Ideas
- sparkle playdough
- faux snow sensory activity
- Frozen Puppets
- Epsom salt painting
- Frozen erupting snow
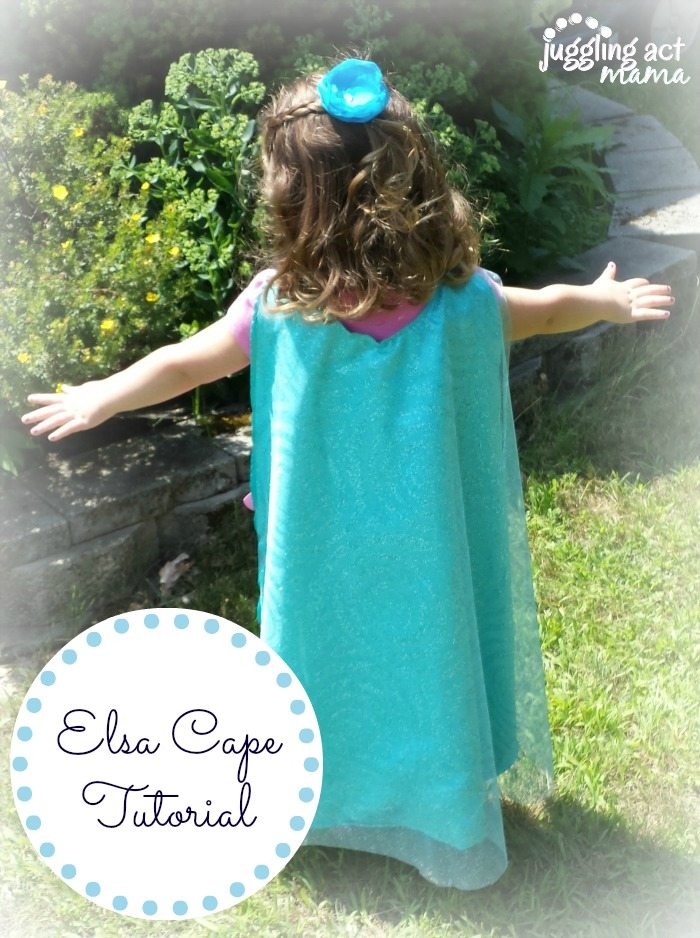
PS – you might also like this awesome Elsa Cape Tutorial!