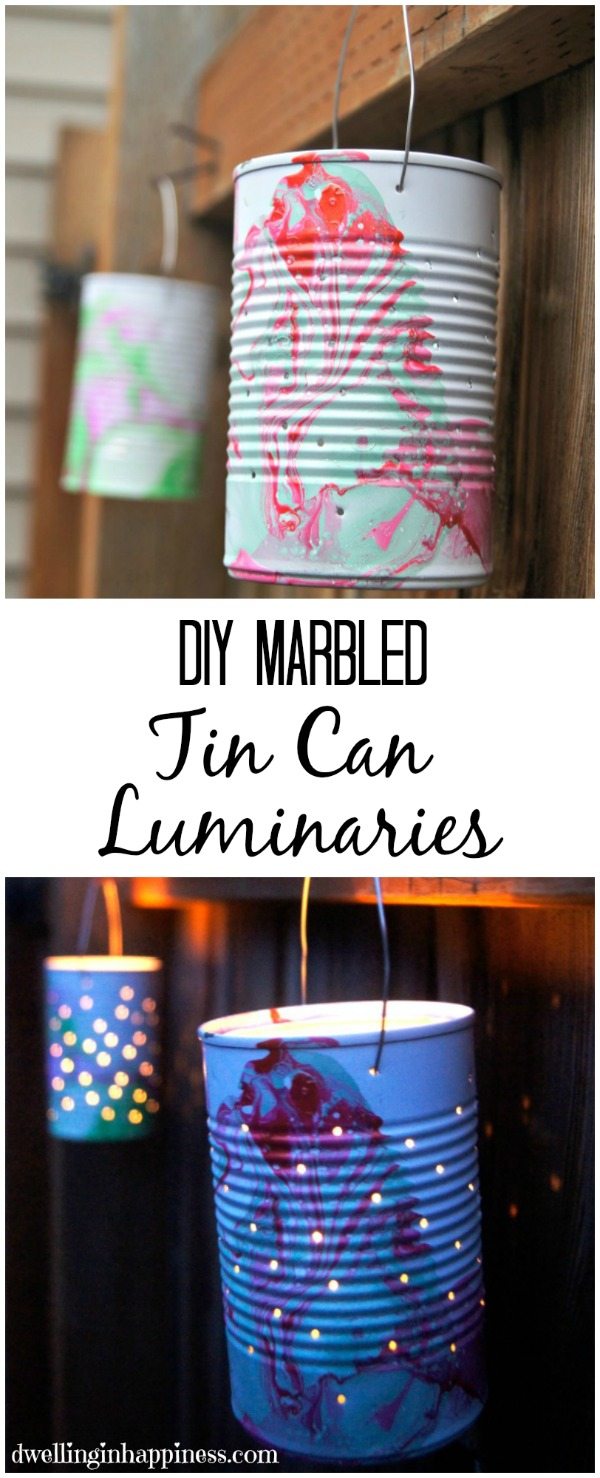
DIY Luminaries | Tin Can Luminaries
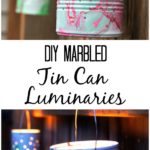

These DIY Luminaries made from tin cans are the perfect way to light up your outdoor BBQs and get-togethers. Tin can luminaries are a fun upcycling project to do with kids this summer but are also great all year long for parties, holidays, and events.
Hello, Juggling Act Mama readers! My name is Amanda, and I blog over at Dwelling in Happiness. I’m so thrilled to be contributing here at JAM! At my blog, you’ll find me sharing all sort of things from simple crafts, to DIY home decor, organizational ideas, tips and tricks, and sometimes even a recipe or two. But my most favorite thing to share is crafts, and I’m so excited to share these super duper cute DIY Marbled Tin Can Luminaries with you!
I’m a huge fan of inexpensive crafts and upcycling, and this craft is just that. We all have tin cans lying around, and if not, you’re bound to open up a can of beans or soup at some point, right? These luminaries are perfect for hanging around the patio, lit up along stairs, or sitting on outdoor tables. And, they’re so pretty! Want to make some? Here’s what you’ll need…
Marbling seems to be the new “it” thing right now, and I wanted to get in on that fun trend, too. I had no idea how easy it actually is, and now, I kind of want to marble everything in sight. 🙂

Materials
Here is what you need to make your own tin can luminaries:
- Tin cans (any size works, but I used the typical 15oz “soup can” size)
- White spray paint
- Nail polish in bright, coordinating colors (as many as you’d like!)
- Plastic container or big bowl filled with water (deep enough to dip your can in to marble) (not pictured)
- Toothpicks (not pictured)
- Thin wire (that is easy to maneuver)
- Hammer and nail
- Wire cutters
- Tea light candles
Instructions
Here’s how to make DIY luminaries
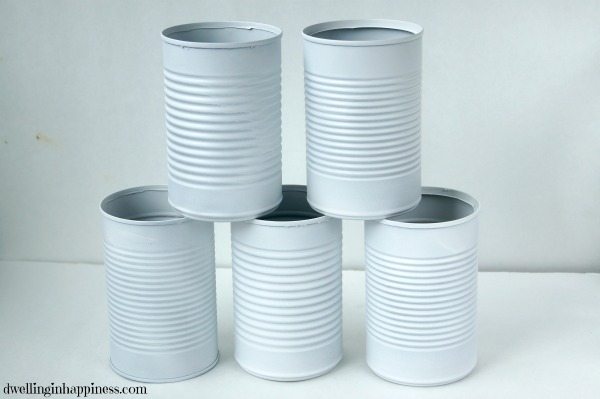
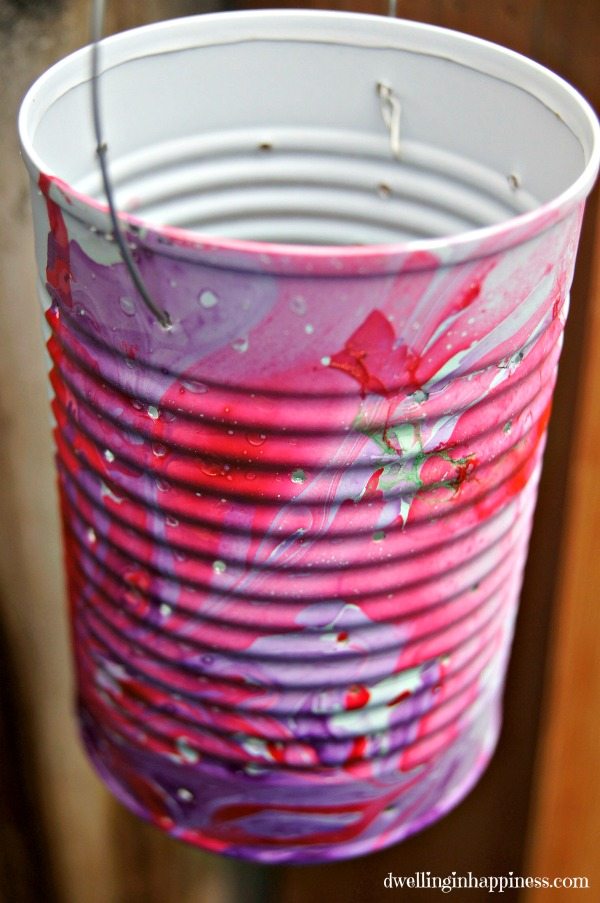
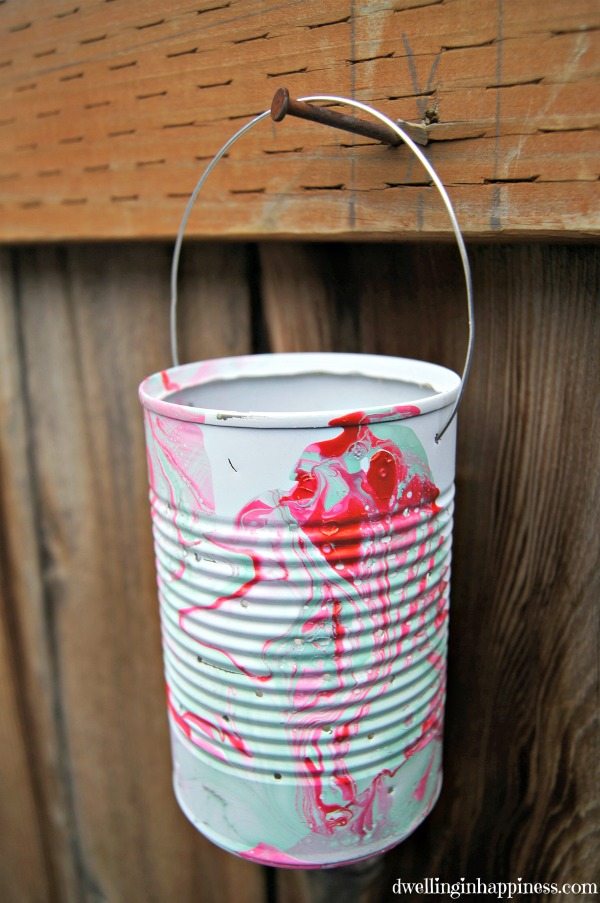
1. Wash and dry out your tin cans, making sure to take off all the paper and glue from the outside (if the glue is stubborn, Goo Gone is great stuff!). Then, spray paint your tin cans white. I also sprayed the inside a little bit.
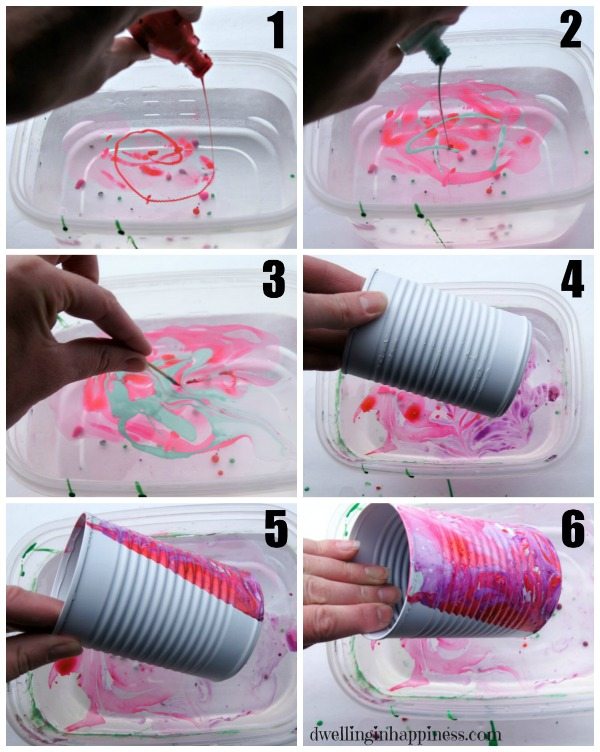
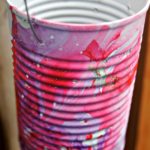
2. Once dry, fill a large plastic container or bucket with warm water. The marbling process needs to be done super quickly or the nail polish will dry before dipping your cans in! (1) Carefully pour one nail polish color into the water. (2) Pour a second nail polish color into the water in the middle of the first color. (3) Very quickly, use a toothpick to swirl the colors together. (4) Dip your can into the water, and slowly turn your can (5) so the nail polish sticks to the can. Continue turning (6) until all the nail polish is on the can. Voila! Continue the process with all the cans. I mixed different colors for all of my luminaries. Remember, you’ll want to do it QUICKLY so the nail polish doesn’t dry (I may have had to do it a few times to get it right..)! 🙂
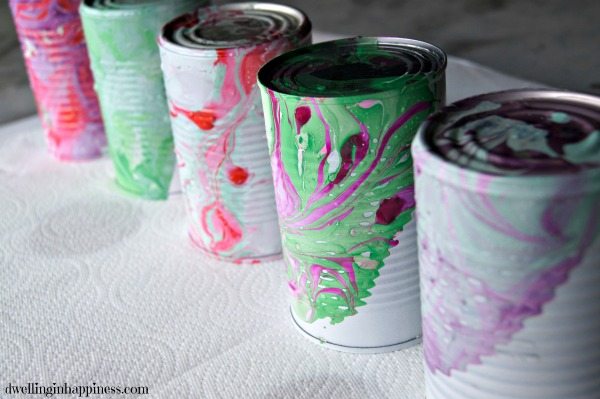
3. Let the luminaries dry for several hours, or overnight.
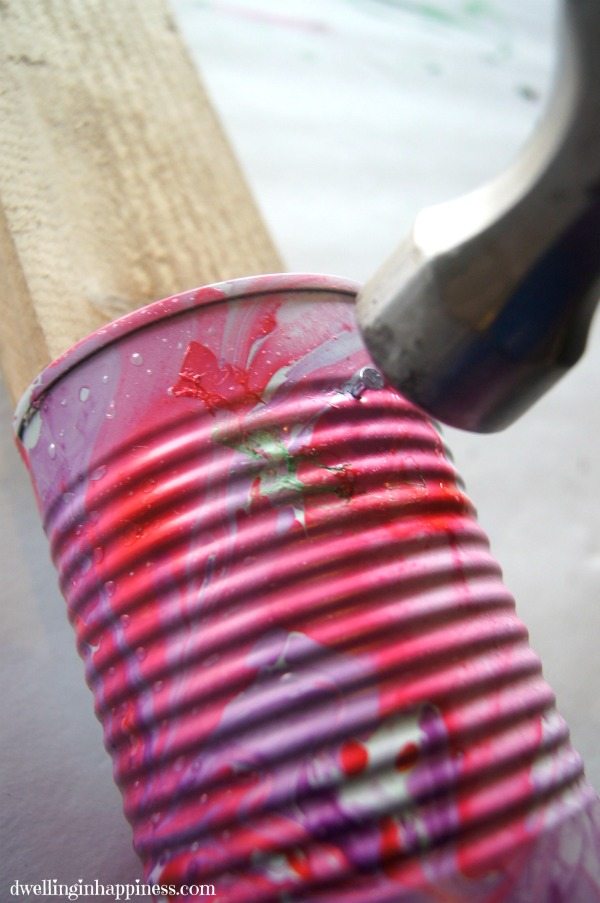
4. Once dry, it’s time to add some holes to the cans. I used a little piece of wood and put it into the can to help stabilize it. Hammer a nail in the can until it makes a hole. Continue hammering the nail in and making holes randomly all over the can. Repeat the process with all the cans.
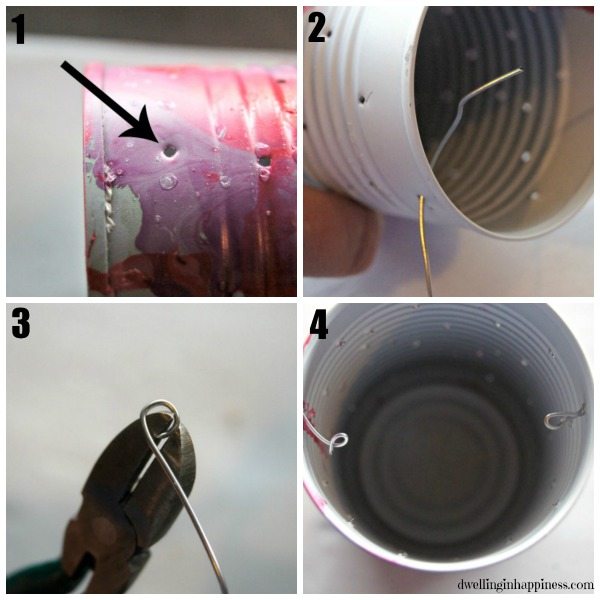
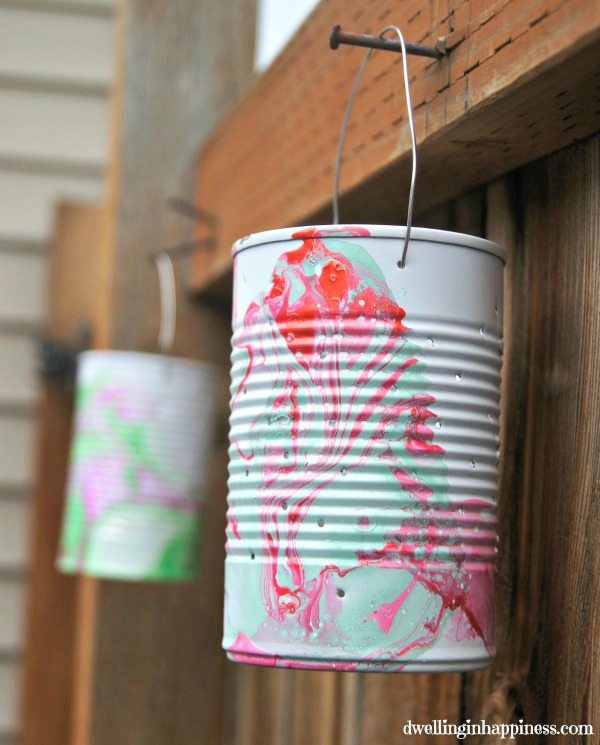
5. Now it’s time to add some wire for hanging. (1) Using the same nail and hammer, poke a hole in the top of the can, and one on the opposite side for the wire. (2) Put some wire through one of the holes, and (3) using wire cutters, twist the wire around itself to create a little “loop.” This is will help keep the wire from coming out. (4) Cut the wire and do the same for the other side, feeding the wire into the hole to the inside of the can, and twist the wire into a loop. Now they are ready to hang!
6. Add a tea light candle to each can. Or, if these will be hung on a wooden fence, use battery operated tea light candles.
Aren’t these the cutest little luminaries? Totally perfect for lighting up your yard for a little summer get-together!
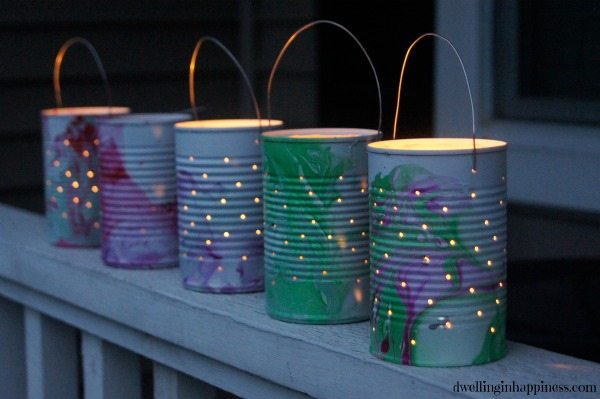
I just love how they look all lit up, too!
I can’t wait to have some friends over this summer just so I can light these pretties up and display them all around our yard! I think I might even make several more. 🙂
More Fun Projects for Outdoors
Here are a few more crafts I think you might enjoy…
I absolutely LOVE these! These are definitely being added to my list of DIY presents. Thanks for the tutorial.
Wow! I never would’ve thought to use nail polish.
Love easy and inexpensive crafs..