White Hot Cocoa Bombs

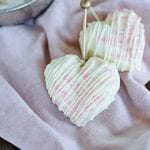
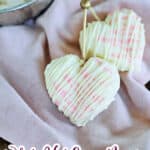
Decadent heart-shaped white chocolate hot cocoa bombs can be filled with mini marshmallows, sprinkles, and more! These beautiful treats are perfect to make and enjoy with your loved ones! And they would be beautiful on a Hot Chocolate Charcuterie Board.

Not long ago, I shared my Hot Chocolate Bomb recipe, and they were a hit! I’m not surprised, they really are delicious, and look so impressive when given as a gift.
I knew that I needed to share more cocoa bomb recipes. What better time to share a chocolate treat than the holidays? These heart-shaped white chocolate hot cocoa bombs look amazing. Seriously, people will think you got them from a fancy boutique, but you’ll know just how easy they are to make! Let me show you how.
What is a Hot Cocoa Bomb?
Hot cocoa bombs are hollow chocolate spheres with fun fillings like sprinkles and marshmallows inside. Simply drop one in a mug of warm milk and you’ll have a rich cup of cocoa in no time. As I’ve said before, they’re a little bit magic. Your kids will love them.

Equipment
As an Amazon Associate, I earn from qualifying purchases. Be sure to check out my Juggling Act Mama Storefront on Amazon where you’ll find all kinds of great products to make your life easier! Thanks so much for being a part of Juggling Act Mama ❤
- Hot Cocoa Bomb Mold – I found this heart-shaped mold online, and there are plenty of options here, however, this is the exact model I used. You can also use a sphere mold.
- Piping Bags
- Mixing Bowl – I love this 3-Piece Glass Mixing Bowl Set – the smallest (1 quart) bowl is perfect for melting chocolate.
- Spoonula like the one in this Silicone Spatula Set to mix the chocolate.
- Baking sheet for transferring the bombs from the counter to the fridge.
Optional:
- Food safety gloves to prevent fingerprints on the chocolate
- Decorative stir sticks – you can totally skip that step if you like.
🧂 Ingredients
- Good quality white chocolate wafers for melting
- Pink chocolate melting wafers
- Fillers for the white chocolate bombs such as:
- Mini marshmallows (marshmallow bits)
- rainbow marshmallows or lucky charms marshmallows
- mini chocolate chips
- colorful sprinkles
You can add in any kind of dry ingredient to melted chocolate while it’s still warm and it will stick. This part is super fun – add sprinkles, chopped pretzels, nuts, crushed cookies, etc.
This is meant to be a brief overview of the white hot chocolate bombs recipe. For step-by-step instructions and a full printable recipe card with ingredients, please scroll down to the teal box below or Jump to Recipe.
🔪Instructions
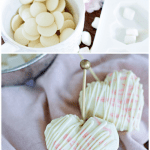
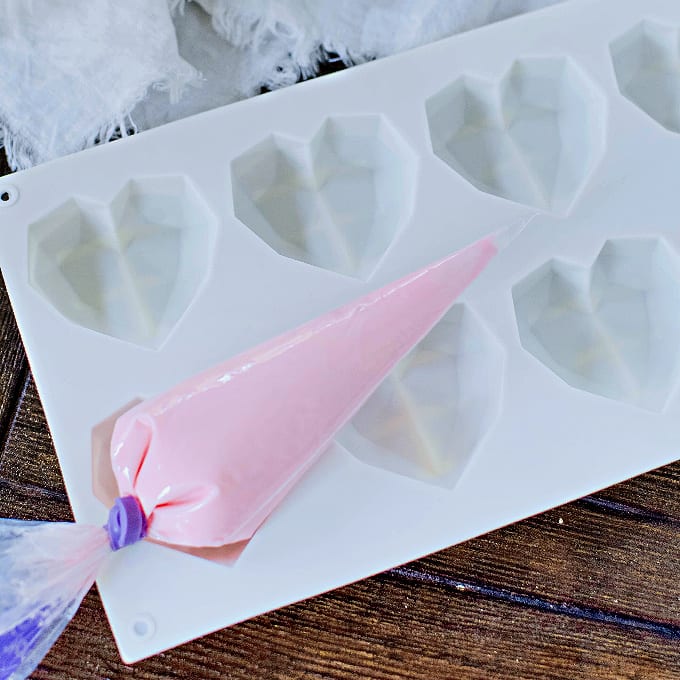
- Start by melting the pink and white chocolate according to the package directions.
- Make sure the silicone tray is completely clean and dry and set the tray onto a plate, tray, or cutting board so you have a solid base.
- First, drizzle or spread some of the pink chocolate in the very bottom of the hearts. Let this set up for a few minutes in the fridge.
- Pour or spoon the white chocolate into each heart-shaped well.
- Place the silicone tray in the freezer for about 5-10 minutes.
- Add a second layer of white chocolate anywhere that seems a bit thin, such as the top edges of the hearts.
- Return to the freezer for about 5 more minutes.
- Remove the tray from the freezer and carefully take one heart out of the mold at a time.
- Set the hearts on the cold tray while you heat a plate in the microwave to melt the edges of the hearts so you’ll have a smoother seam between the two halves.
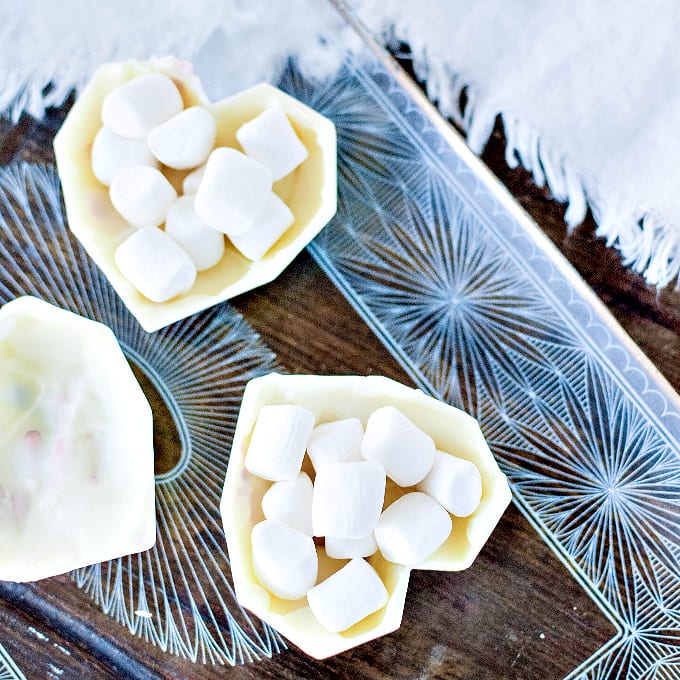
- Add marshmallows to half of the hearts.
- Melt the edges of the empty hearts and set them onto the filled hearts. They will stick together and harden quickly so you’ll want to focus on finishing one before moving to the next.
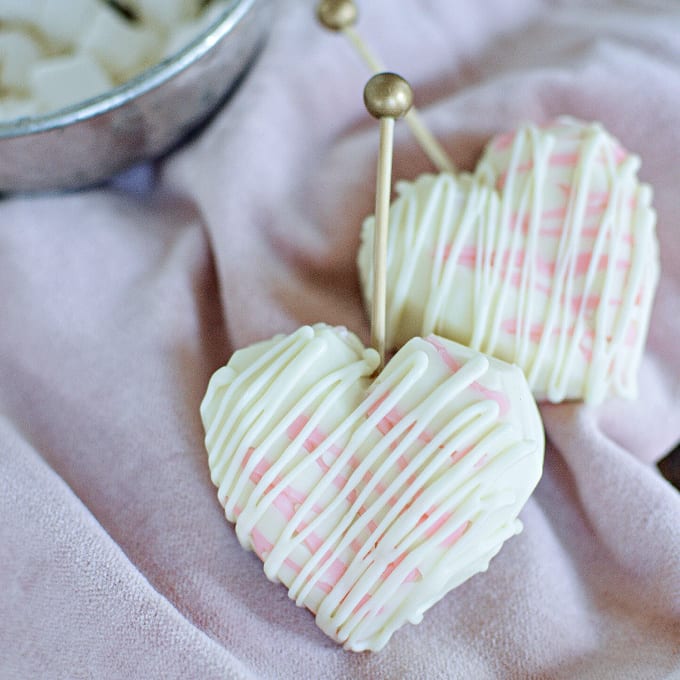
- I inserted the cocktail picks at this time while the chocolate was still a bit soft.
- Melt the white chocolate to drizzle on top. I used the same exact chocolate that was used for the hearts. You can use different chocolate, just make sure it has some cocoa butter listed in the ingredients to help with drizzling vs clumping.
- Cut only a tiny hole at the end of the piping bag, then quickly drizzle the hearts one at a time, repeat with the remaining hearts.
- You may return the hearts to the freezer (or fridge) for a few minutes to have the drizzle of chocolate set up.
- To enjoy: Heat your favorite milk to about 135 to 145 degrees Fahrenheit and then carefully pour over the chocolate hearts and stir well.

⭐ Tips
Use really good quality chocolate wafers. They’re a little more expensive, but, in my opinion, if you’re going to make your own hot cocoa bombs, you should use the best ingredients you can afford.
Make sure the silicone tray is completely clean and dry.
To add stability, set the mold onto a plate, tray or cutting board so you have a solid base. This will make it easier to transfer to the freezer.
Be sure not to over fill your mold or the two halves won’t stick together!
Chill your hot chocolate bombs for at least 30 minutes so they stay together.

☕ How to Use a Hot Cocoa Bomb
Now for my most favorite part!! Heat your favorite milk to about 140-degrees F. Place the white chocolate bomb into a mug and gently pour the hot milk on top. Stir well to combine and you have yourself a decadent white chocolate hot cocoa!
🎁Gifting Ideas
Place each of the hot chocolate balls into a cupcake liner and place them into a little decorative box lined with tissue paper or confetti. I really love these cupcake boxes to give to family and friends during the holidays. These also make a great gift for teachers, coaches, and tutors and can be packaged individually in these little boxes.
These cocoa bombs are great for Valentine’s Day, St. Patrick’s Day or really anytime you want to give an impressive homemade gift. It’s a fun way to enjoy a creamy cup of hot chocolate on a cold day!
⏲️ How to Store Chocolate Bombs
Store your cocoa bombs at room temperature in an airtight container away from any light or heat sources. These are best enjoyed within 1-2 months.
More Yummy Hot Cocoa Ideas
You’ll definitely want to check out our Hot Cocoa Mixes with pretty (and free!) downloadable labels, too.


White Hot Cocoa Bombs
Not ready to jump on the hot chocolate bomb craze yet? Don’t forget to pin the hot cocoa bomb recipe for later! When you do make it, please be sure to tag me on Instagram @jugglingactmama or #jugglingactmama – I’d love to see your pictures! And finally, if you get a chance, please comment and leave me a ⭐⭐⭐⭐⭐ rating below!

Heart-Shaped White Chocolate Hot Cocoa Bombs
As an Amazon Associate, I earn from qualifying purchases.
Ingredients
- 1 cup good quality white chocolate melting wafers divided
- ¼ cup pink chocolate melting wafers
- ½ cup mini marshmallows
Instructions
- Start by melting the pink and white chocolate to package instructions. The pink should be in a piping bag, the white should be in a small bowl. Be careful not to burn the chocolate. You do not want it to be really hot, just completely melted and smooth.
- Make sure the silicone tray is completely clean and dry. Set the tray onto a plate, tray or cutting board so you have a solid base as some silicone molds are a little flimsy. This will make it easier to transfer to the freezer.
- First drizzle or spread some of the pink chocolate in the very bottom of the hearts. Let this set up for a few minutes in the fridge.
- Pour or spoon the white chocolate into each heart shaped well and use a rubber spatula to evenly spread the chocolate into every corner of the mold.
- Place the silicone tray in the freezer for about 5-10 minutes.
- Remove from the freezer and add a second layer of white chocolate anywhere that seems a bit thin, such as the top edges of the hearts.
- Return to the freezer for about 5 more minutes.
- Remove the tray from the freezer and carefully take one heart out of the mold at a time. You’ll want to work a bit carefully to help keep fingerprints off the chocolate. I will sometimes wear gloves to help with this.
- Set the hearts on the cold tray while you heat a plate in the microwave. Then use this heat to gently melt the edges of the hearts so you’ll have a smoother seam between the two halves. Repeat with all of the hearts.
- Add marshmallows to half of the hearts.
- One at a time, melt the edges of the empty hearts again and set onto one of the filled hearts. They will stick together and harden quickly so you’ll want to focus on finishing one before moving to the next.
- I inserted the cocktail picks at this time while the chocolate was still a bit soft.
- Melt the white chocolate to drizzle on top. I used the same exact chocolate that was used for the hearts. You can use a different chocolate, just make sure it has some cocoa butter listed in the ingredients to help with drizzling vs clumping.
- Cut a tiny hole in the end of the piping bag–after the chocolate is transferred into it and melted– then quickly drizzle the hearts one at a time.
- You may return the hearts to the freezer (or fridge) for a few minutes to have the dizzled chocolate set up.
Equipment
- Silicone heart shaped mold
- Piping Bags
- Cocktail picks
Notes
These hot cocoa bombs have little decorative stir sticks, but you can totally skip that step if you like. You can add in any kind of dry ingredient to melted chocolate while it’s still warm and it will stick. This part is super fun – add sprinkles, chopped pretzels or nuts, crushed cookies, etc. Tips for Making Chocolate Bombs Use really good quality chocolate wafers. They’re a little more expensive, but, in my opinion, if you’re going to make your own hot cocoa bombs, you should use the best ingredients you can afford. Make sure the silicone tray is completely clean and dry. To add stability, set the mold onto a plate, tray, or cutting board so you have a solid base. This will make it easier to transfer to the freezer. Be sure not to overfill your mold or the two halves won’t stick together! Chill your hot chocolate bombs for at least 30 minutes so they stay together. How to Use a Hot Cocoa Bomb Now for my most favorite part!! Heat your favorite milk to about 140-degrees F. Place the white chocolate bomb into a mug and gently pour the hot milk on top. Stir well to combine and you have yourself a decadent white chocolate hot cocoa! Hot to Store Chocolate Bombs Store your cocoa bombs at room temperature in an airtight container away from any light or heat sources. These are best enjoyed within 1-2 months.