Painted Chevron Table Runner Tutorial
Create this beautiful Painted Chevron Table Runner Tutorial with a few simple materials. These are gorgeous for holidays and parties.
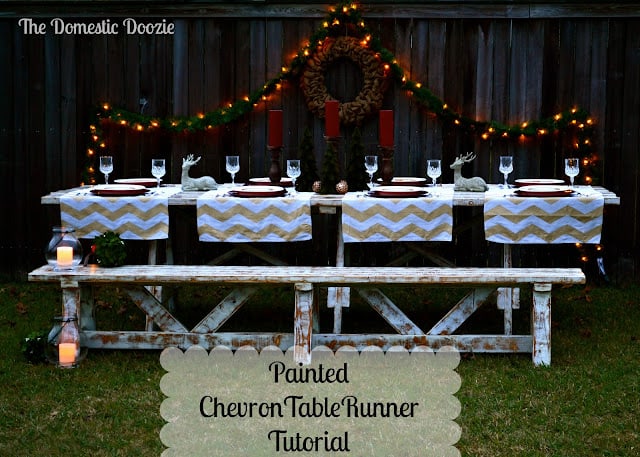
Hello hello! I’m Ko from The Domestic Doozie and I am thrilled to be here with y’all today. The holidays are by far my favorite time of year, I especially love the parties and gatherings that take place. How about an easy way to dress up your holiday table and incorporate a trendy style while on a tight budget? Yes? Well look no further!
Supplies
The following are affiliate links. We are a participant in the Amazon Services LLC Associates Program, an affiliate advertising program designed to provide a means for us to earn fees by linking to Amazon.com and affiliated sites.
- 6×9 Canvas Drop Cloth (Walmart)
- Paint (I used Martha Stewart’s glitter line (2 jars) from Home Depot)
- Blue Painter’s Tape
- Chevron Templet (I’ll show you how to make one)
- Sewing Machine
Be sure to check out my Juggling Act Mama Storefront on Amazon where you’ll find all kinds of great products that will make your life easier! Thanks so much for being a part of Juggling Act Mama ❤
Instructions
Here’s how to make your own Painted Chevron Table Runners:
Before you begin, wash your drop cloth on the hot cycle (it will shrink a bit) in your washing machine and dry completely. This will help the weave to tighten up and give the fabric a soft linen feel.
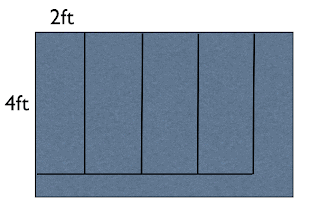
Cut 2ftx4ft runners from the drop cloth. The above image shows you where I cut mine from. If you need different dimensions just cut what you need.
{The left over scraps can be ripped to make beautiful linen like ribbons to wrap holiday packages with so don’t throw them away!}
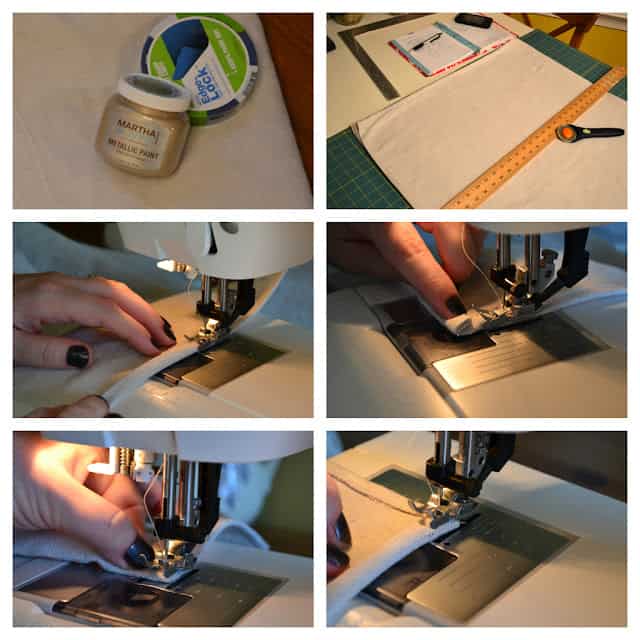
Now simply sew around the edges of each runner to give it a nice clean look. I take a ton of short cuts here by starting at an edge, folding it 1/4 inch on itself and folding it over again. It will look like a little 1/4 inch wide roll that you stitch straight down the middle.
When you are a half inch from the bottom, fold the fabric up toward the machine making your 1/4 inch roll and stitch to the middle of it.
With your need is down position, pivot your fabric and continue sewing till you’ve finished all your sides.
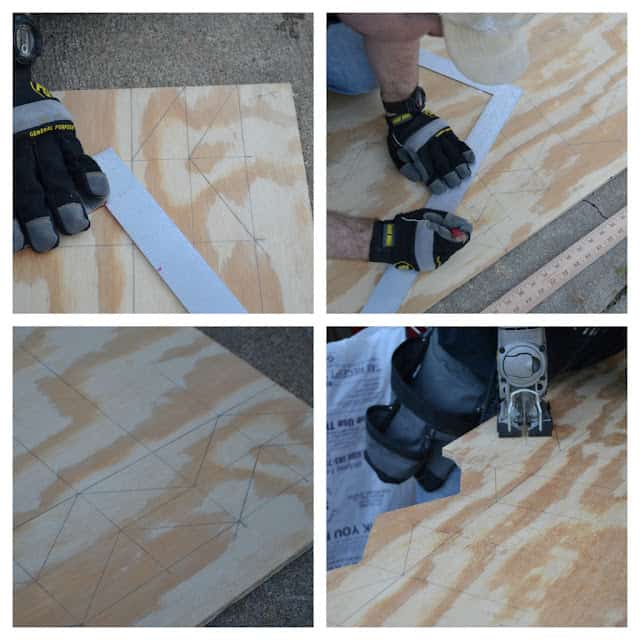
Next up is your chevron templet. Mr. Doozie (if you head on over to my blog, you’ll see I keep him very busy), made mine out of plywood since I plan on using it for as long as this trend lasts. You could make your’s out of cardboard as well.
To get the chevrons even you need 3 long parallel lines to start. We used a spacing of 2 inches between the lines which gave a chevron with an overall height of 4 inches from top to bottom.
Next we drew lines perpendicular to the long ones every 3 1/2 inches. This will basically give you a grid on which you simply ‘connect the dots’ up and down to make the zig-zag for the top and bottom of the chevron. The best part is you can adjust the height and width to make exactly the sized chevron you want!
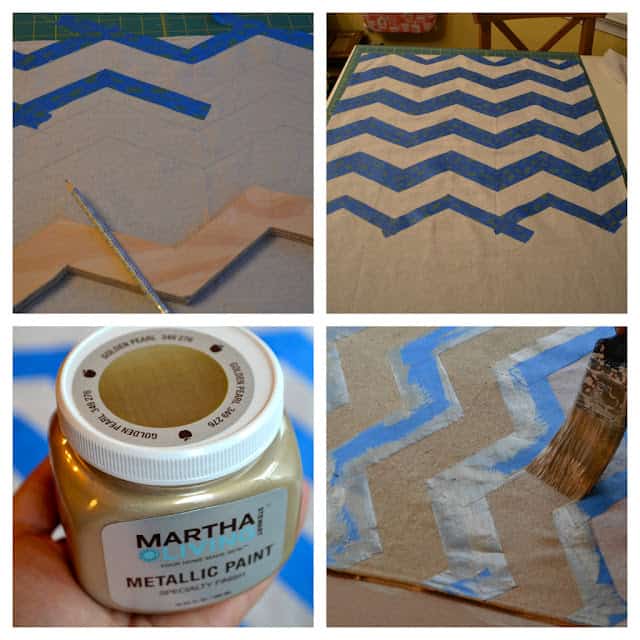
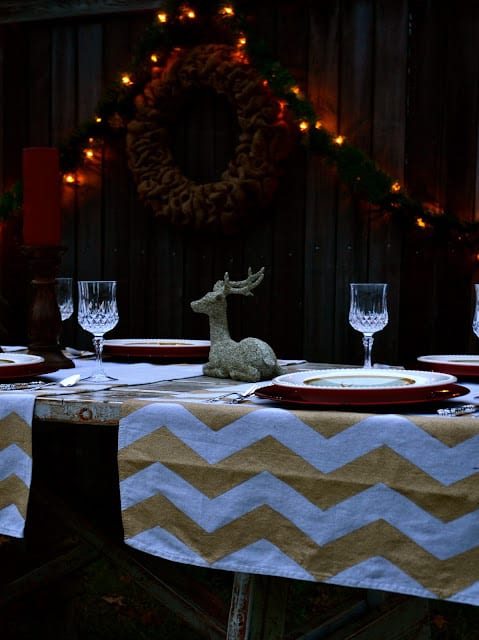
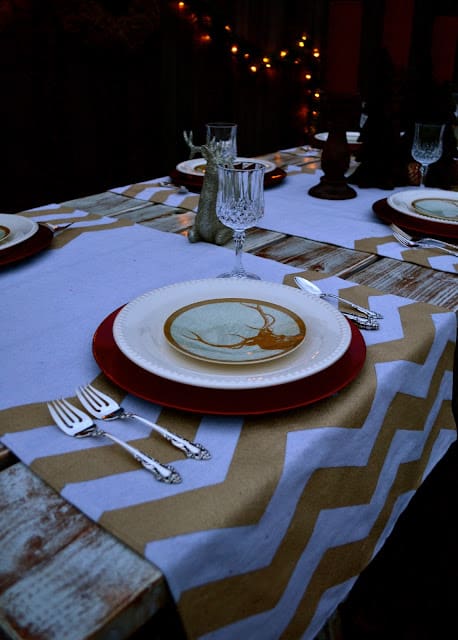
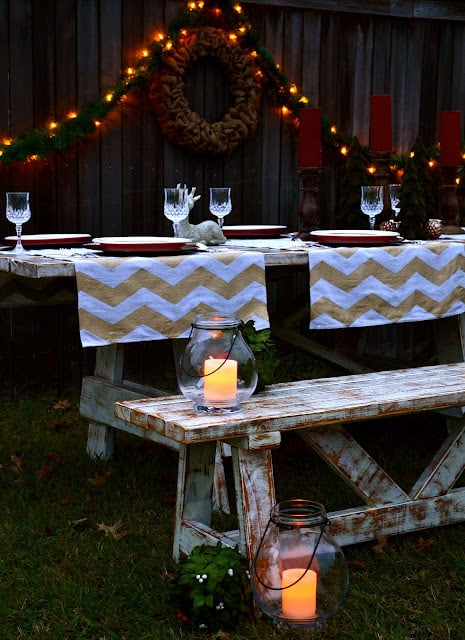
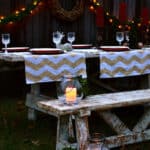
This is where it gets fun! Trace your chevron template onto your “linen” table runners and tape off every other one. I liked the look of only doing a handful on each side, but you do what you like best! You really cant go wrong! Then paint away! I tried using a roller at first but it didn’t give me the coverage I was hoping for so I stuck to the brush and loved the final outcome. Let the paint dry overnight, remove the tape and commence a happy dance! You’ve just rocked some very awesome table runners!