Shaving Cream Paint

Make whimsical art prints with Shaving Cream Paint! It’s a simple boredom buster kids will love.

My 6-year-old nephew loves art and it is his art that I bring you today. He used Shaving Cream Paint to create these fun and whimsical lava-inspired prints. (What 6-year-old do you know that doesn’t love the idea of volcanoes and oozing lava?) I have it on good authority that your kids will love making “messy” art too.
You’ll find everything you need and instructions on how to make the lava prints below. I’m sure he would like to thank his mom for helping with his blog post. 😉
Materials
The following are affiliate links. We are a participant in the Amazon Services LLC Associates Program, an affiliate advertising program designed to provide a means for us to earn fees by linking to Amazon.com and affiliated sites.
- Shaving cream (You’ll likely need less than you think, we used about 1.5 cups worth. Thinner layers are better.)
- Liquid watercolor paint
- Cardstock (I love this one because it’s a great value and you can use it for a lot of fun projects)
- Tray or bin to work in
- Toothpick or similar item that you can use to swirl the paint
- Recycled cardboard or something with a firm, clean-cut edge that you can use to scrape away the shaving cream.

Be sure to check out my Juggling Act Mama Storefront on Amazon where you’ll find all kinds of great products that will make your life easier! Thanks so much for being a part of Juggling Act Mama ❤
Instructions
Step 1: Spray the shaving cream on your tray or work surface in a thin layer and then drip paint over the surface so the color is in all areas.
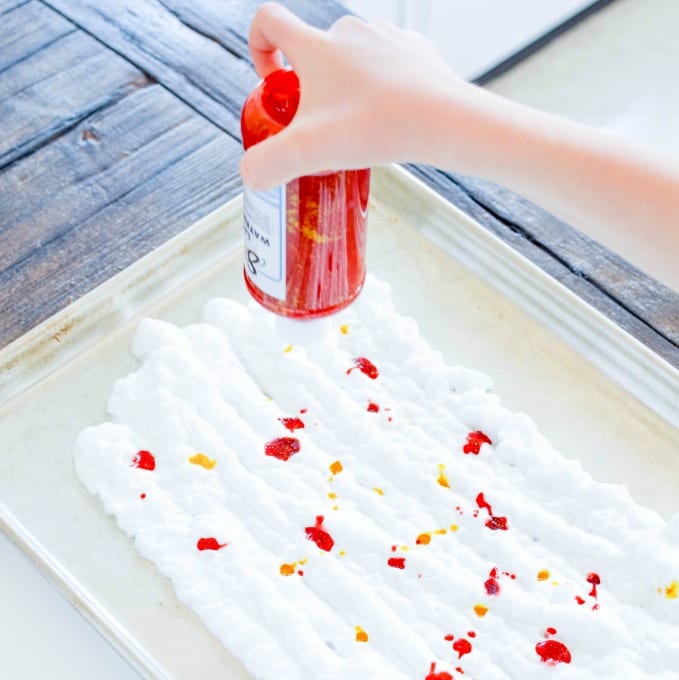
Step 2: Use the toothpick to swirl and marble the paint colors into the shaving cream, you’ll want to swirl vs mix as that will muddle the colors.

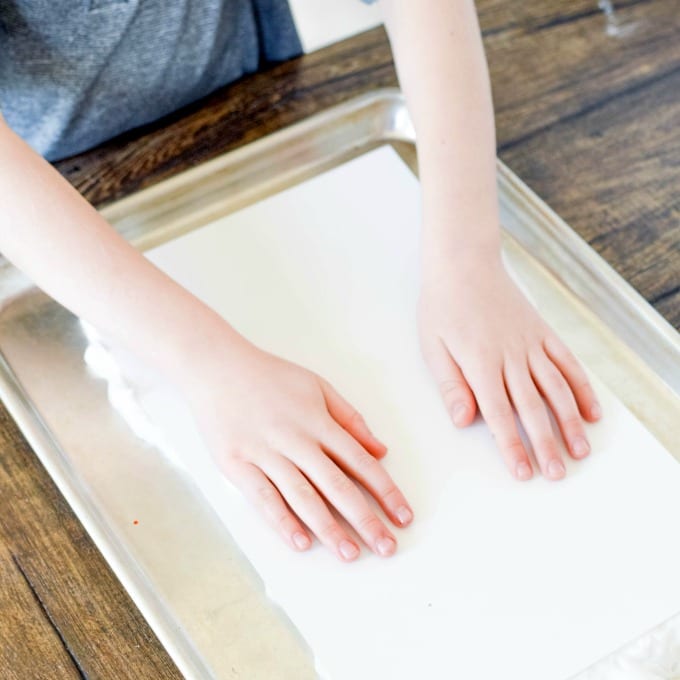
Step 3: Lay the paper on top and then evenly press the paper down and smooth over the surface to ensure even distribution.
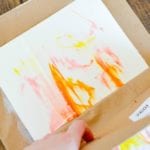
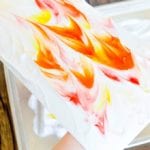
Step 4: Carefully lift the paper. Shaving cream will come up with it, this is okay.

Step 5: Use the recycled cardboard to scrape the excess shaving cream paint off of the art paper. Press firmly. You can mix this back into the tray or discard it.

Lay your art out to dry, even our thick bristol board (card stock) curled right away but flattened out as it dried. To make more art prints just add additional paint to maintain a high level of color. Simply repeat the same steps for each print.
More Kids Crafts & Activities
Here are some more fun ideas that I think you will love!