Ice Cube Painting
Painting with Ice Cubes – When the weather is hot and humid, the kids will love this fun and easy Ice Cube Painting activity!

My niece and nephew absolutely love doing craft projects with their mom. Recently, they had some fun with food coloring and made ice cubes and then painted with them!
Doesn’t this look like so much fun??
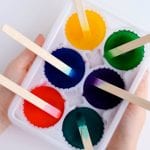
Materials
We’re going to show you just how simple this project is to do – you only need a few simple items.
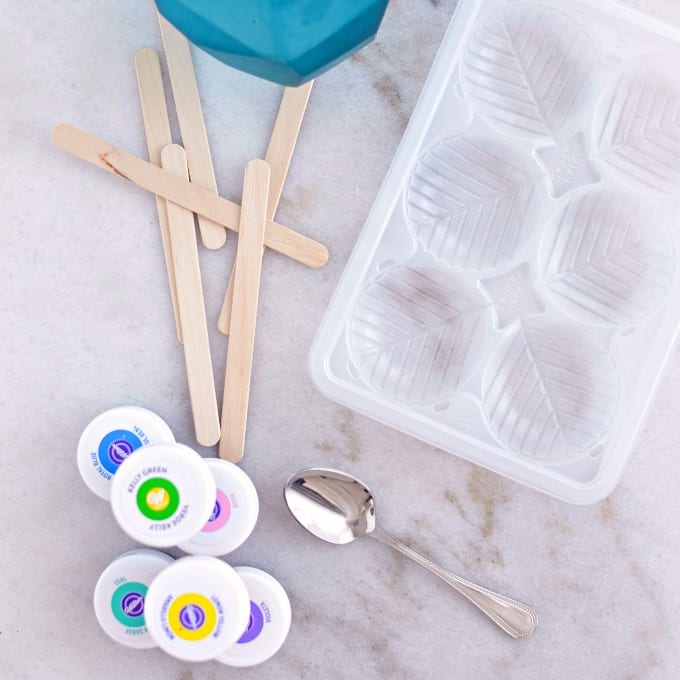
- water
- craft sticks
- Gel food coloring
- ice cube trays
- watercolor paper for painting
Ice Cube Painting FAQ
Here are some frequently asked questions about this project:
I prefer Wilton gel food coloring because it creates such vibrant colors. Other kinds of food coloring will work, but the colors may not be as bright.
I like the watercolor paper from Crayola because it is designed to handle the extra liquid that you have with painting with watercolors and ice cube painting. Other thick papers will work as well such as construction paper.
Craft sticks are basically clean unused popsicle sticks that are fabulous for all kinds of crafts. (Check out our Craft Stick Star Bookmarks!) You can find these at your local craft store, or order them online.
Ice Cube Trays
While standard ice cube trays work just fine, you might want to check out molds with cool shapes. If the ice cube wells are too small, the ice will melt really quickly, so you want ones that are a medium size.
The trays we used are actually from Trader Joe’s Steamed Chicken Soup Dumplings! You can even use a small popsicle mold and skip the craft sticks altogether.
Benefits of Ice Cube Painting
Ice Cube Painting projects are great for kids because it helps strengthen their coordination and fine motor skills.
Painting with ice cubes is also a great opportunity to talk about color, chemical reactions and of course, is a fun way for kids to be creative.
More Fun Painting Activities:
- Epsom Salt Painting
- Q-Tip Painting
- Puffy Paint
- What to Paint on a Rock
- Rainbow Activities for Kids
- Creative Button Crafts
- Rainbow Kinetic Sand
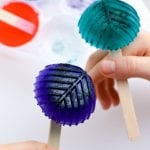
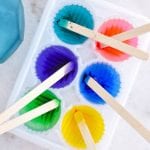
How to Make Colored Ice Cubes
Before you begin, add some old newspaper down on your table. The food coloring will stain so it’s a good idea to protect your surface while you’re making the ice cubes and when you are painting.
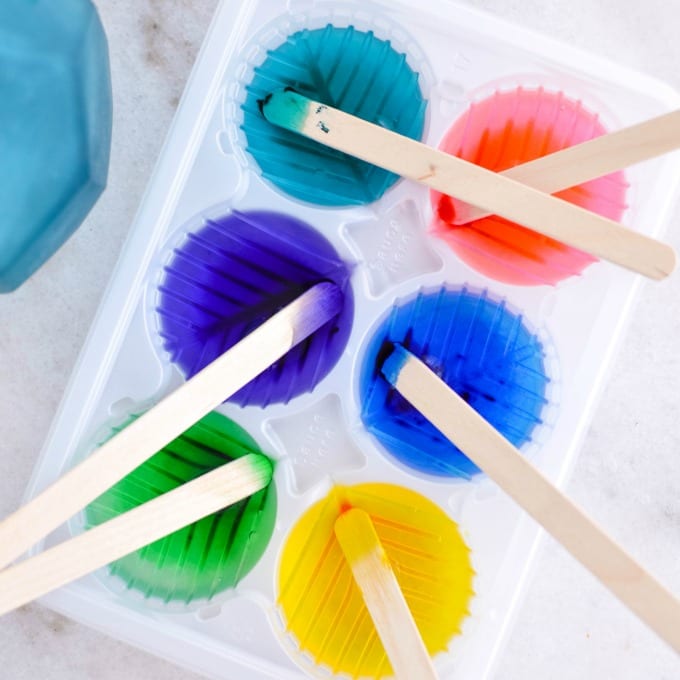
- To make the colored ice cubes, add a little bit of water to each of the wells – about 2/3 full.
- After that, dip a craft stick into one of the gel colors and then gently mix the color into one of the wells. Leave the craft stick in that spot, allowing it to rest on the side, and move on.
- Continue adding color into each of the wells and mixing gently. Try not to let the water splash since that will change the color.
- Slide the ice cube tray into the freezer and let sit for several hours until the ice cubes are frozen solid.
Tip – If you want to mix colors, use a small measuring cup to mix the colors, and then pour it into the tray.
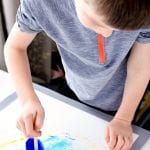
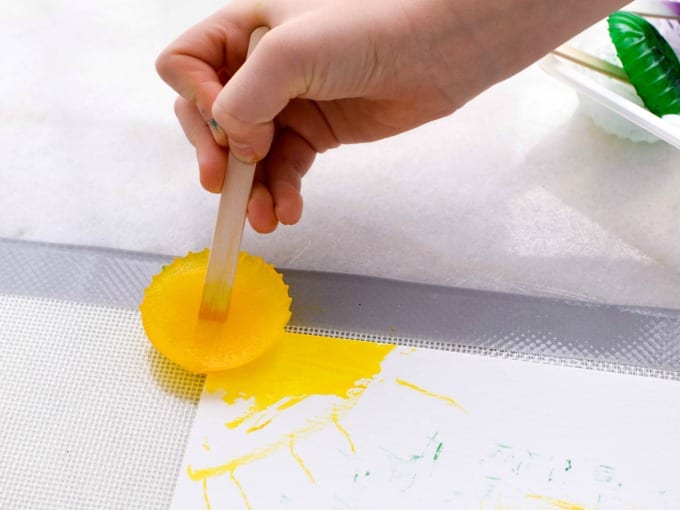
Painting with Ice Cubes
- Again, cover your surface with old newspaper and set out the watercolor paper.
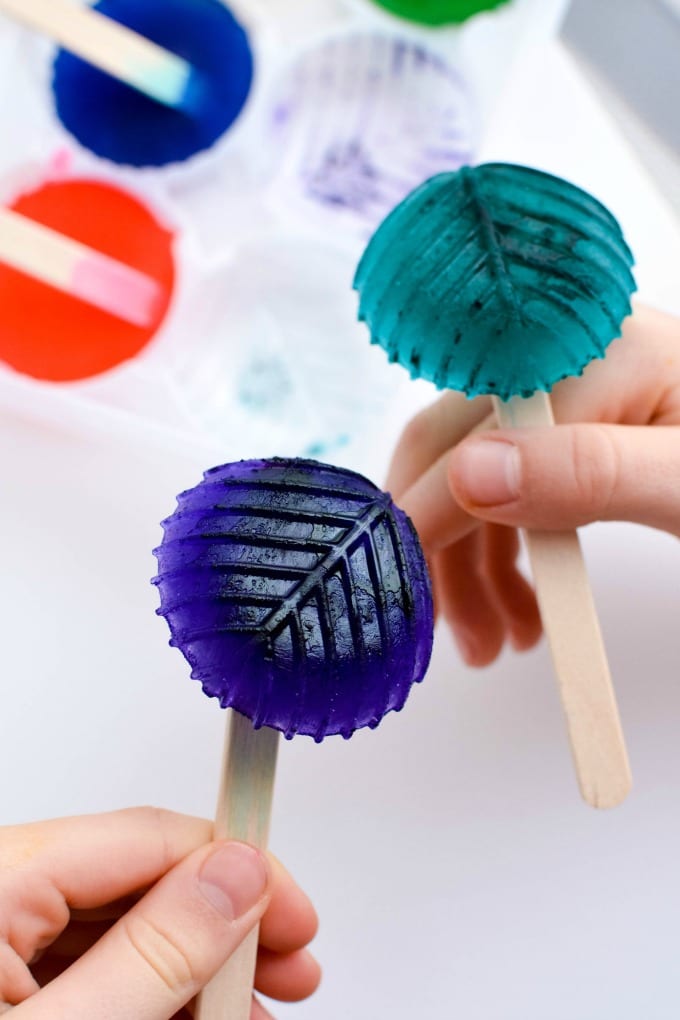
- Gently wiggle the craft sticks to loosen the colored ice cubes from the mold.
- Use the sticks to slide the ice cube across the paper to paint.

More Activities for Kids
If you enjoyed this Ice Cube Painting activity, you might also like these fun Boredom Buster projects:
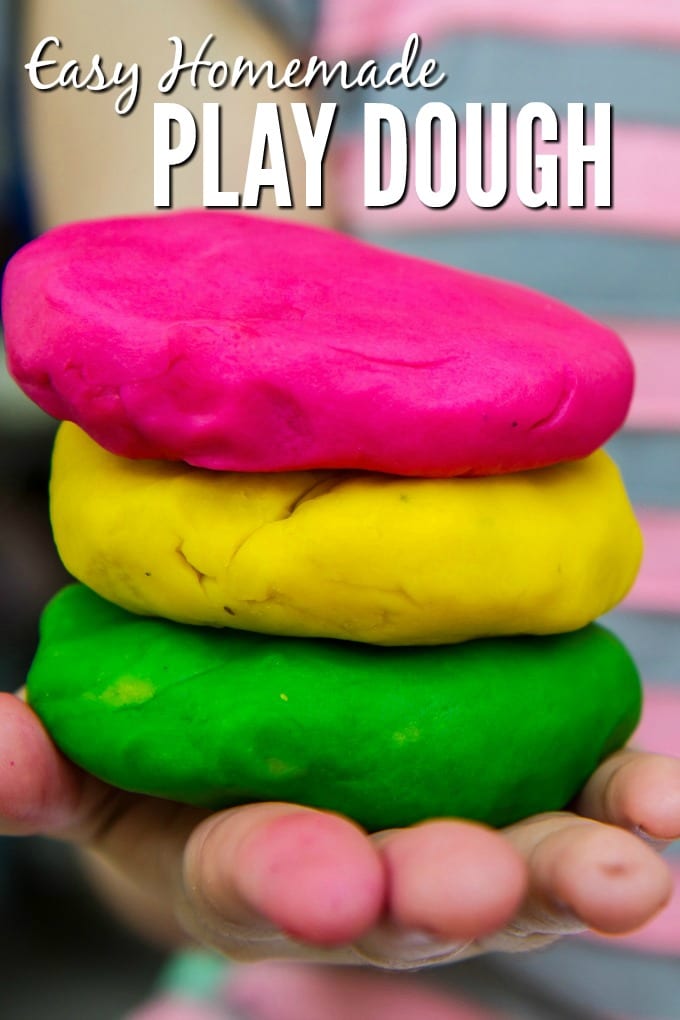
- I’m always amazed at how long kids will play with compounds made from simple household ‘ingredients’ like slime, playdough and this really cool Faux Snow!
- For warm-weather fun, check out our DIY Chalk Paint, which is a cinch to make and loads of fun!
- And while you’re outside, why not have some fun with homemade bubbles?

Another great activity! I just love the things you share 🙂