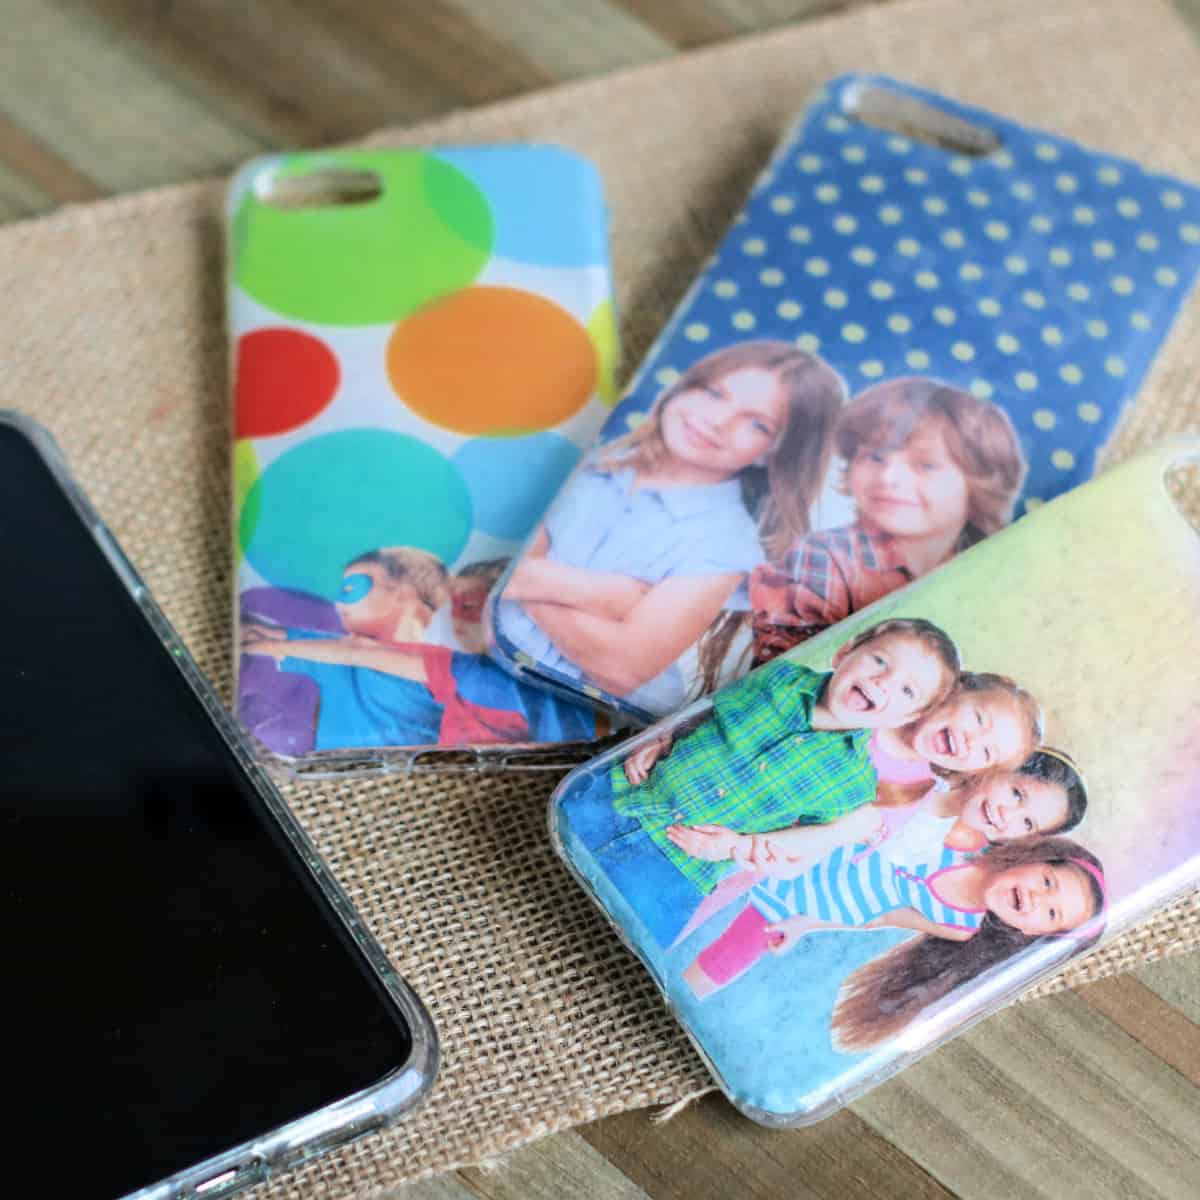
It's simple and inexpensive to design your own phone case with photos. These make really sweet gifts, too. We'll show you how so you can get crafting right away.

Jump to:
To create a DIY phone case design, start by finding a photo you really love. Next, find a pretty or fun tissue paper, and you're nearly halfway there to having a customized phone case!
This DIY phone case is a fabulous project for kids to do for Mother's Day, Father's Day, or Grandparent's Day.
When you design your own phone case using this method, it's really pretty inexpensive! You can pick up just about all the things you need at your local dollar store, or order supplies online.
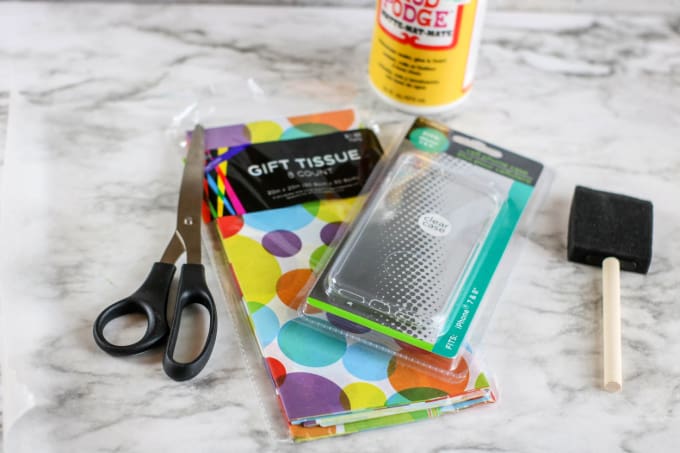
✂️ Supplies Needed
The following are affiliate links. We are a participant in the Amazon Services LLC Associates Program, an affiliate advertising program designed to provide a means for us to earn fees by linking to Amazon.com and affiliated sites. We also participate in other affiliate projects. For more information, please see our disclosure policy.
- Photo paper
- Tissue paper
- Mod Podge in matte finish
- Paintbrush
- Clear silicone cell phone cover (available at Dollar Tree)
- Ruler
- Scissors and/or craft knife
Be sure to check out my Juggling Act Mama Storefront on Amazon where you'll find all kinds of great products to make your life easier! Thanks so much for being a part of Juggling Act Mama ❤
📝Instructions
Here's how to make your own phone case with pictures:
- Measure your cell phone case. Print a photo of your choosing to fit the case. Place the cell phone case over the picture (as seen in the photo below), check the placement, and trim the photo to fit, if necessary.
- Place the silicone phone case over the tissue paper and trace. Trim off the excess tissue paper to fit it to the case.
- Use the paintbrush to apply a thin layer of Mod Podge inside the silicone phone case where you plan to place the photo. Put the picture over the Mod Podge, with the image facing outward through the phone case.
- Apply a second thin layer of Mod Podge over the photo. Press the tissue paper into the phone case.
- Allow the Mod Podge to dry completely (at least 24 hours). Use scissors or a craft knife to trim around the hole for the camera and your phone's buttons.


⭐ Tips
✔️Use light layers of mod podge for best results.
✔️Allow the mod podge to dry completely before placing the case onto your phone.
💭 Frequently Asked Questions
Here are some questions (and answers!) readers often ask about using mod podge to create a DIY phone case design.
Mod podge is used for many types of crafts, including decoupage. It is used as a glue, but is also used to seal and finish surfaces.
Mod podge may take up to 24 hours to dry fully, depending on how much is used.
When you're using craft supplies like mod podge and tissue paper, the cost for making your own cell phone case is pretty minimal.
Ordering a custom phone case online can be expensive, but making one using your own photos is very cost effective.
Tips for Printing Photos
- Use a good quality photo paper - I like this one.
- Be sure that your printer is not low on ink.
- Under printer settings, always select the highest print quality.
- Photos use a lot of ink, so take care removing them from the printer so as not to smudge them.
Printer recommendation: I have used Canon printers for many years, and now have a Pixma model that I love. It is simple to use and produces good quality prints.
More DIY Phone Case Ideas
Here are some more phone case DIY ideas you might enjoy:
- Scrap Paper Smart Phone Case from Lovely Indeed
- Easy Paint Chip Phone Case from Plaster & Disaster
- DIY Glitter Phone Cases from Persia Lou
- Washi Tape Cell Phone Cover from The Crafty Blog Stalker

Isn't this fabric phone holder from Happiest Camper so cute? All you need to do is choose your favorite fabric and sit down to sew!
Similar Projects
Here are some other DIY projects you might also enjoy:
- Shrinky Dink Initial Key Chain Project
- Cricut Picture Frame for Father’s Day
- DIY Coaster Ideas
- Rustic Herb Garden Planter
- Easy Sharpie Craft Projects Anyone Can Do
📋 Tutorial
Not ready to Design Your Own Phone Case yet? Don’t forget to pin this project for later! When you do make it, please be sure to tag me on Instagram @jugglingactmama or #jugglingactmama – I’d love to see your pictures!

Photo DIY Phone Case
As an Amazon Associate, I earn from qualifying purchases.
Materials
- printer paper
- gift tissue paper
- Mod Podge matte
- paint brush
- clear silicone cell phone color available at Dollar Tree
- ruler
- scissors and/or craft knife
Instructions
- Measure your cell phone case. Print a picture of your choosing to fit the case. Place the cell phone case over the photo, check the placement, and trim the photo to fit if necessary.
- Place the silicone phone case over the tissue paper and trace. Trim off the excess tissue paper to fit it to the case.
- Use the paint brush to apply a thin layer of Mod Podge inside the silicone phone case where you plan to place the photo. Put the picture over the Mod Podge, with the image facing outward through the phone case.
- Apply a second thin layer of Mod Podge over the photo. Press the tissue paper into the phone case.
- Allow the Mod Podge to dry completely. Use scissors or a craft knife to trim around the hole for the camera and your phone's buttons.




Comments
No Comments